
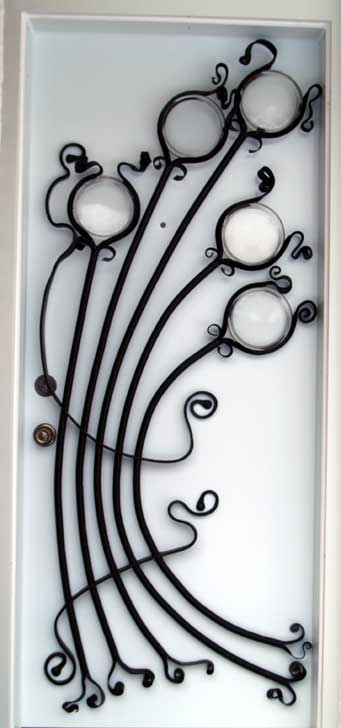
'Disks' - Front Door Security Panel
Graham House - Guelph Ontario
Winter 2009
|
'Disks' - Front Door Security PanelGraham House - Guelph Ontario
|
|
 |
The project was for a classic 1960's bungalow style home
in the city's NE corner. The requirement was to create a
security panel for the narrow ripple glass insert that ran
just beside the locks on the original front door. (Canadians
were so trusting back then!) The customer also wanted an art
piece that would make a statement added to what is otherwise
a pretty standard and un-interesting building front. She was
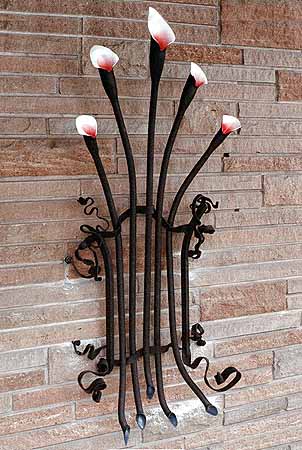
quite taken with the 'Lilly Arbor'
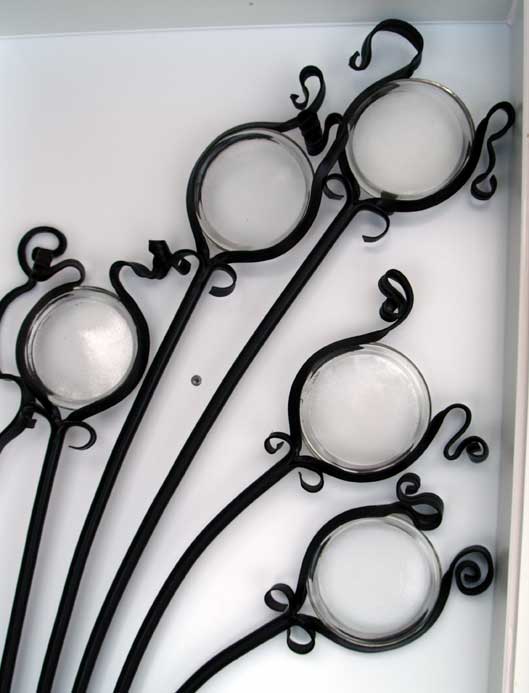
piece I had done a couple of years back. I thought I would work with the last of some glass disks I had picked up 'on spec' in Virginia previously. The main lines of the piece is a set of long sweeping curves, rather than using the more straight line grill work that is more conventional. These main elements were forged from 1 inch diameter pipe, split on both ends, then flattened and curved. These elements pass through holes hot punched in flat bar (1 1/2 x 3/16). The support bars end in free form reversal curves. The whole piece is secured to the door using carriage bolts (only rounded heads on the exterior). I had suggested the use of colour for the coating, primarily to reduce the visual weight of the piece. The customer decided on flat black, as the exterior colours of the house had not been chosen at the time the project was undertaken. |
 |
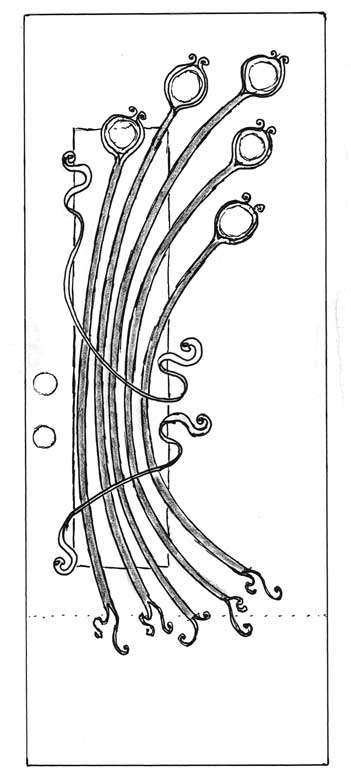
My normal way of working is that I do not 'forge to a
blue print'. I do keep to the general outline of my concept
drawing, but as the work progresses, individual elements may
vary as the complex curves are forged. In this case the door
with its glass inset panel defines the framework for the
finished piece. The location of the existing door knob and
lock are also fixed points. Other than those restrictions,
the flow of the overall piece could be allowed to vary as it
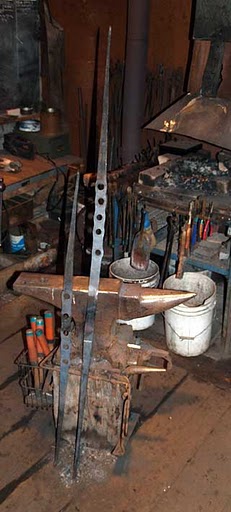
was forged. This image shows the two main support elements, ready for the final forging into two wide arcs ending in spirals and reversal curves. Each piece started as a length of 3/16 X 2 inch flat stock. A long taper has been drawn on either end. At the very tip the bar was upset and hammered to a circle, set at 90 degrees to the flat side of the centre bar. Then the flat central portion of each had pilot holes drilled. These were drifted open to accept the roughly 1 inch diameter tubes that are the main elements of the panel. This results in a distinctive swelling of the bar around each hole, an effect only possible with hot forging technique. Check the lengths at this point. The flat bar started as roughly 3 and 4 foot long. You can see that the tapering step has lengthened these to about 4 and 5 1/2 feet. |
 |
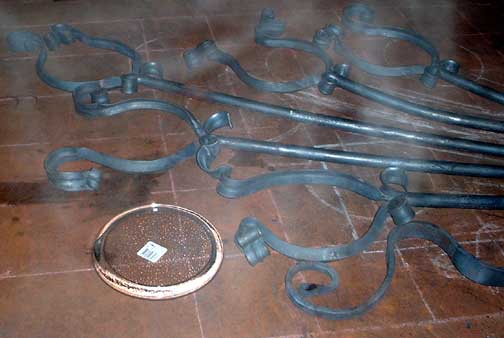
Next step is to alter the round holes to distorted ovals.
This is required to allow all the tubes to pass through the
curved support elements, which cant to a diagonal line. Once
this is done, the lower finals (made separately) will be
welded in place, then ground to make that addition
invisible. (Ah - Thats how he did it!). Then the tube
elements are welded securely to the supports (from the back
side where it does not show). This image shows the finished support elements. You can see that all that length very quickly disappears once a few curves are created. The door measurements can be seen drawn on the layout table, this is a standard 32 inch wide. The faint grid lines have 6 inch spacing. You can also see my concept design drawn out in chalk on the layout table. Compare the final result with the design, and you will see that although these are close - they are not identical. The spirit of the intended design remains. |
 |
Last is fitting the upper frames for the glass disks and
welding into place. Now, there was a fair amount of adjusting that had gone on up to this point to get the previously forged bracketing pieces to fit correctly. Each had to slot into the mouth of the pipe uprights, hold the glass firmly, fit into the other elements - and hopefully all look good. I had laid the brackets out in pairs, then carefully moved each set together into the heated 'clean studio' for painting. First the whole element was given its black paint, and allow to dry. Then a layer of plastic coating (normally used for tool handles) was applied to the inside of the curves. This would allow some flexible cushioning between the glass disks and the supporting brackets. Next the disks were put in place, covered with cardboard and taped securely between the brackets. Each was carefully lettered to maintain the order I had carefully maintained through the whole process. |
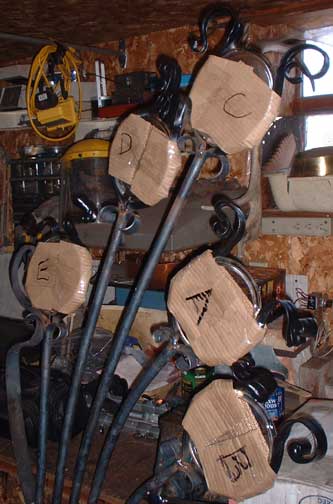 |
Then I took the brackets and welded each into its matching
uprights. This image is the result... Notice anything odd? Well, the finished bracket and disk combinations just did not fit the way I had originally laid them out. I ended up moving them around at the last minute to get them to both fit and look just right. |
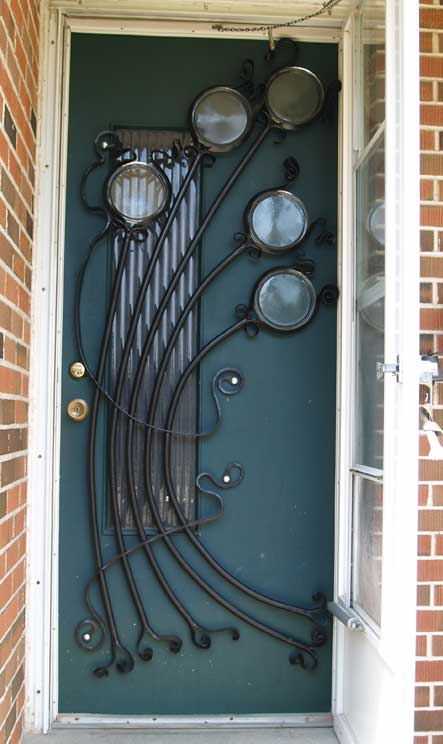
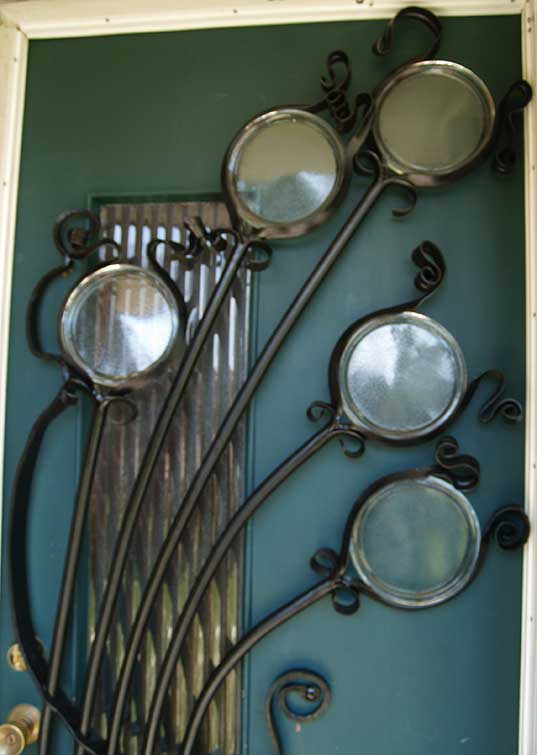
| The installation was on to the existing hollow panel wooden door. It was painted a dark green colour, and also had a typical glass and aluminum 1960's style screen door fitted. Although the customer was extremely happy with the completed piece, there was no doubt the impact was greatly reduced by this setting. |
 |
 |
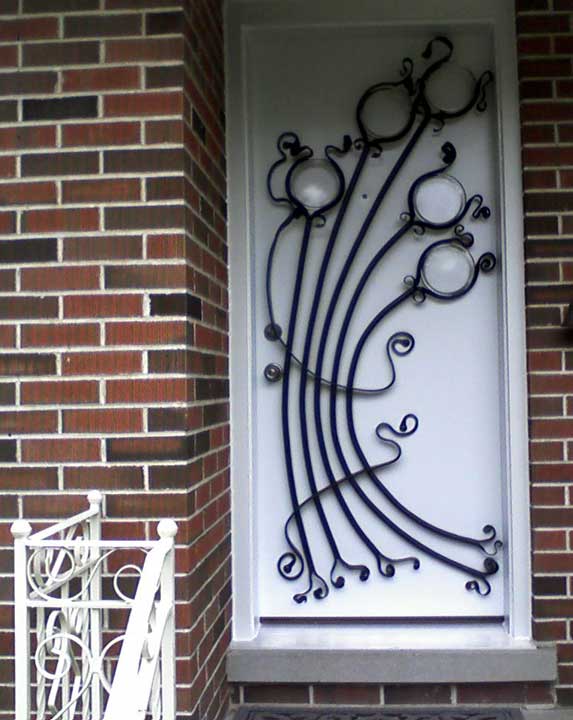
| As it turned out, the customer was so pleased with the
'grill' that she replaced that door. The new one was a plain
white enamelled steel. She chose an insulated foam core
type, and removed the original aluminum screen door
entirely. Although no longer required for its original security purpose, the new setting definitely exhibits the forged panel! |
 |
 |