
Overview and 'Undersea'
'Breakers & Undertow'
'Shore', 'Trees' and 'Sky'
'Sea to Shore to Sky'
Railings for Maxwell & Reade House - Manitoulin Island
2009 - 2010
|
|
|
|
|
Overview and 'Undersea'
|
'Breakers & Undertow'
|
'Shore', 'Trees' and 'Sky'
|
|
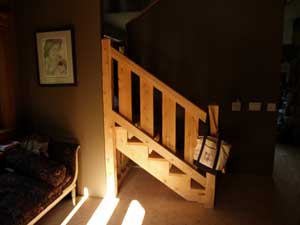
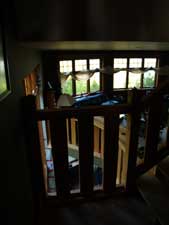
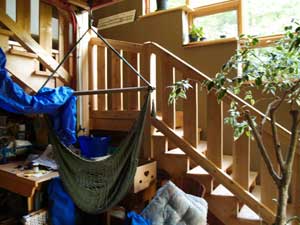
In the later part of 2008, I was contacted by a couple wanted to engage an artisan blacksmith to create a set of railings for their custom built home on Manitoulin Island. They had originally met me at Summerfolk in Owen Sound. I had been mounting more of a gallery presentation than a real sales booth there for a good number of years. They had liked what they had seen and kept me in the back of their minds as their house construction progressed. One of their objectives was to work with local (or regional in my case) artisans for as many elements of the overall project as possible. The fitting of personalities and approaches to work was also quite important to them. In a departure I found quite wonderful, they were not in any rush to have work completed. 'Do it once - and do it right' and 'Good work takes time' were concepts they held themselves, and expected from those they employed. They also had taken time to fully review not only my portfolio , but also to read over the sections 'On Custom Designs' and 'Gallery of Details'. They had a general concept of might be possible, and realistic budget expectations (something I greatly appreciate!) . A few general images of the house interiors were sent via e-mail, and some initial design concepts were discussed. Note that the images below all show the 'temporary' rough pine stairs and railings that were put in place when the owners moved into the house. |
 |
 |
 |
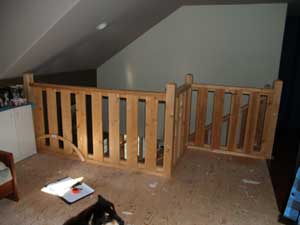 |
| From the front entrance hall - a short piece of stair railing leading towards the second floor. | A dark image from the upper landing, over the open concept living room. It shows the gap over the basement stairs | From the basement, looking up towards the stairs from the main floor. Note the wide expanse of east facing windows. | The loft like area at the top of the stairs on the second floor. |
|
Key to what ever designs that were chosen for the project would be the ability to transmit light and not block the viewing lines. The house has much higher than normal ceilings (ten feet) and expansive use of glass. The house is set on the side of a lake , and is fully ringed by trees in a hardwood forest. As the building is set into the side of a hill, the view south off the main floor is actually at tree top level out over the water. The plan is open concept, with the main floor having a central fire place dominating the combination living, dining and kitchen spaces. The placement of the stairs is to one side of a two story bank of windows. Design Phase
Given the raw distance from Wareham to the site of the home on Manitoulin Island, an extended visit was scheduled to let me meet the clients, view the spaces and take my initial measurements. I was able to come prepared with some general design concepts. Over the course of an afternoon and evening, we did undertake the usual looking though my reference books on historical and contemporary architectural metalworks. There was a lot of fast scribbling, trying to get various proposed ideas from both sides down on paper. The project would entail a large number of smaller individual sections of railing, which fitted together to encompass the whole. There was a landing between each of the basement to main, and main to 2nd story, levels. All together there were a total of at least 21 individual sections, flat and diagonal rectangles, triangles, end posts, and long hand rail pieces. This complexity actually would prove a blessing. In the end the very longest panel was only eight feet long, so it meant none of the segments were impossibly heavy. It also meant that the transport via ferry to Manitoulin would not prove a major problem. (An extra bonus was that even though there were a lot of individual panels, so many joints meant there was considerable 'fiddle factor' which eased potential installation problems.) It was during this overnight session with the clients
that I came up with the overall concept that would inspire
the design of the individual elements : 'Sea to
Shore to Sky'. |
 |
 |
|
|
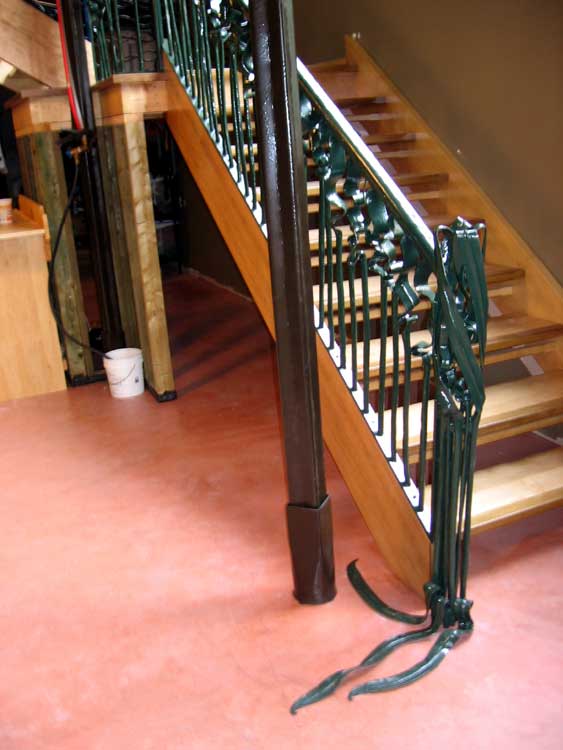
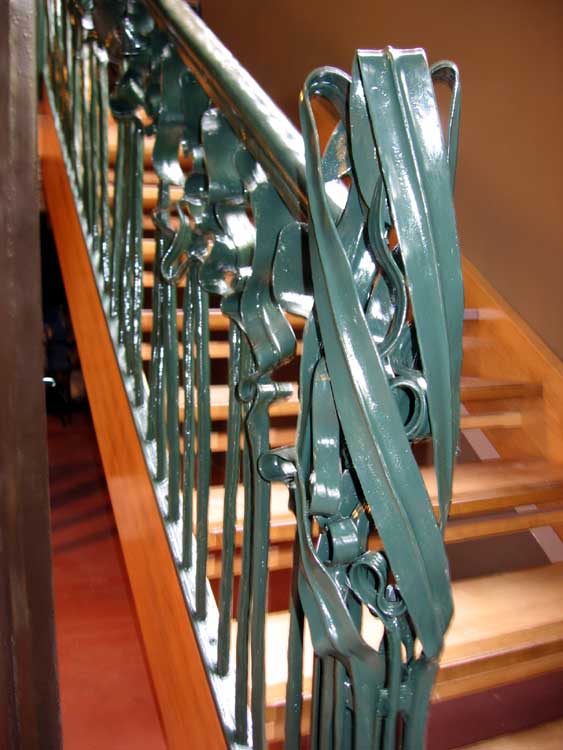
'Undersea - Kelp'
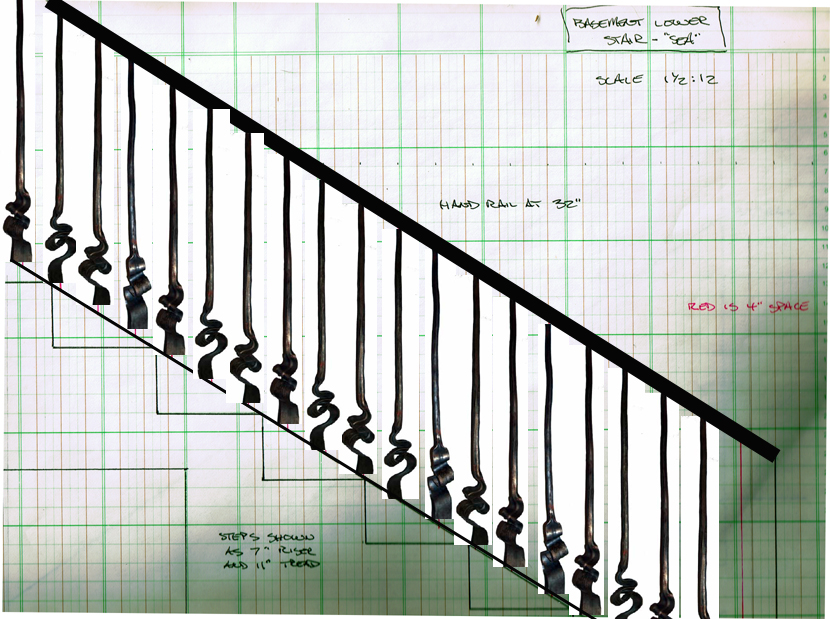
The basic element used for the basement stairs would be a series of stylised kelp fronds. Each starts as a piece of steel angle, aggressively forged, with one end flattened and formed to a tight set of irregular reversal curves. No two uprights in the entire series would be identical. Originally I had conceived of the pieces sitting curves down as shown. The main reason was to place the mass at the bottom, and also to reduce obstructing the windows. |
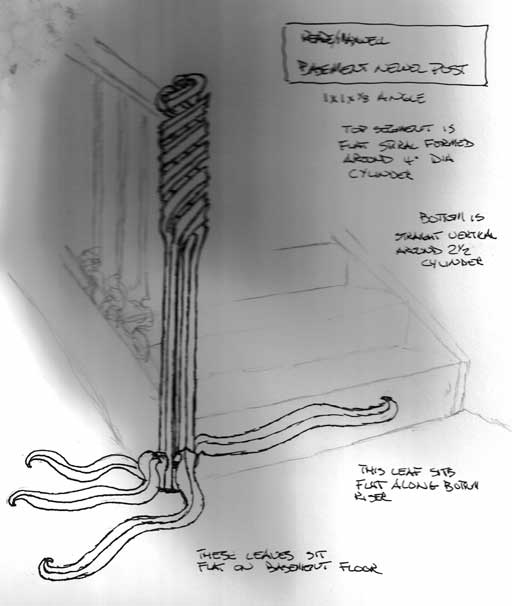
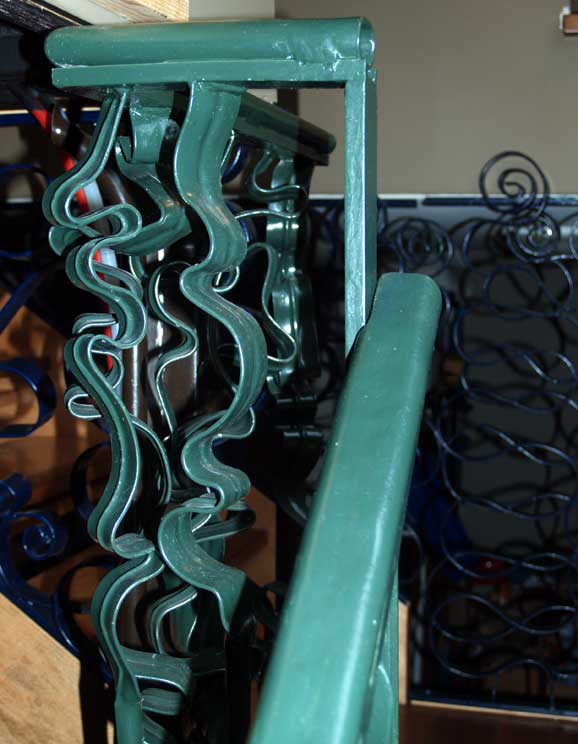
'Undersea - Whirlpool Post'
I wanted to provide a substantial and interesting end post to the long sequence of forged work up along the stairs. this was certainly one of those times it was easier to draw than actually fabricate! The concept was a bundle of kelp plants caught in a swirl as in a small whirlpool created the form. The ends of the leaves would spread out along the floor at the base of the stairs. |
'Transition - Kelp to Undertow'
As the line of kelp up the stairs reached the landing, there would be a transition to the next overall design. The length of each set of reversal curves was increased, pulling the eye into the full line of curves to be found in those next elements. |
 |
 |
 |
|
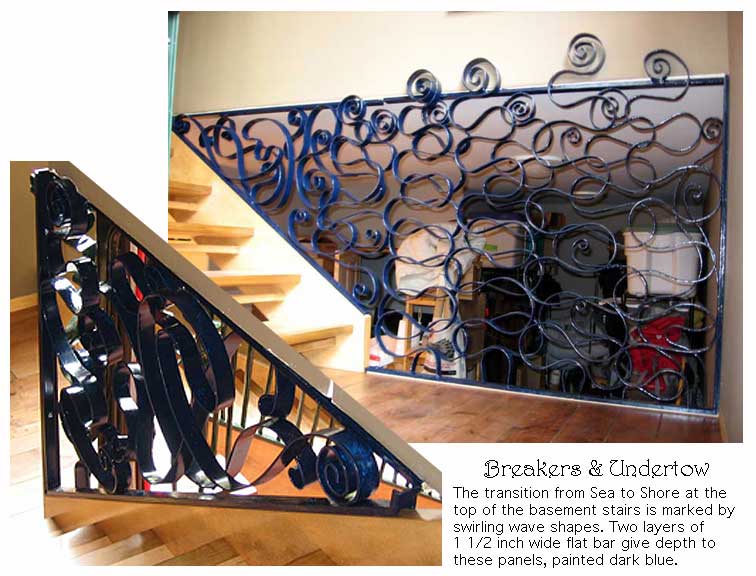
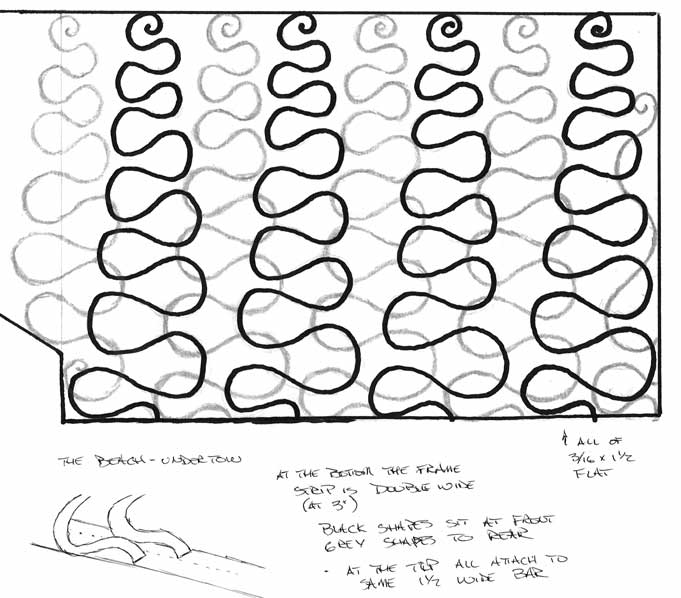
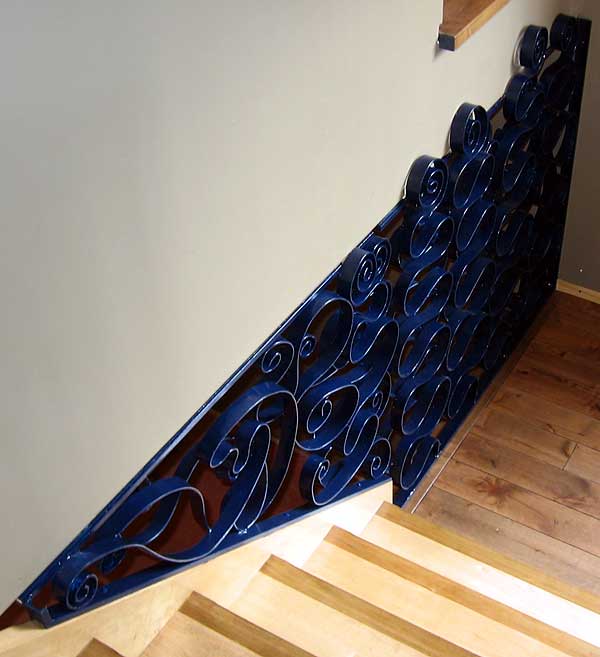
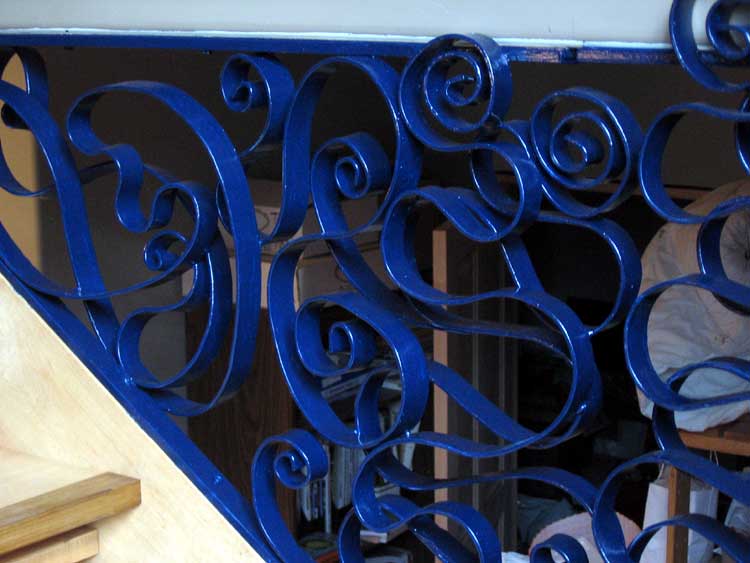
'Beach - Undertow'
This design started with the technical aspects of the Ontario Building Code. Because all the panels on the lower landing had areas of flat wall above them, there was problem with the 'no climb' restriction. The design would still have to conform to the 'no hole bigger than 4 inches' requirement. The solution was an interlocking set of reversal curves and spirals. The individual elements were formed of 1 1/2 wide by 3/16 thick flat stock, and are set on two levels. These sections are thus over 3 inches deep. |
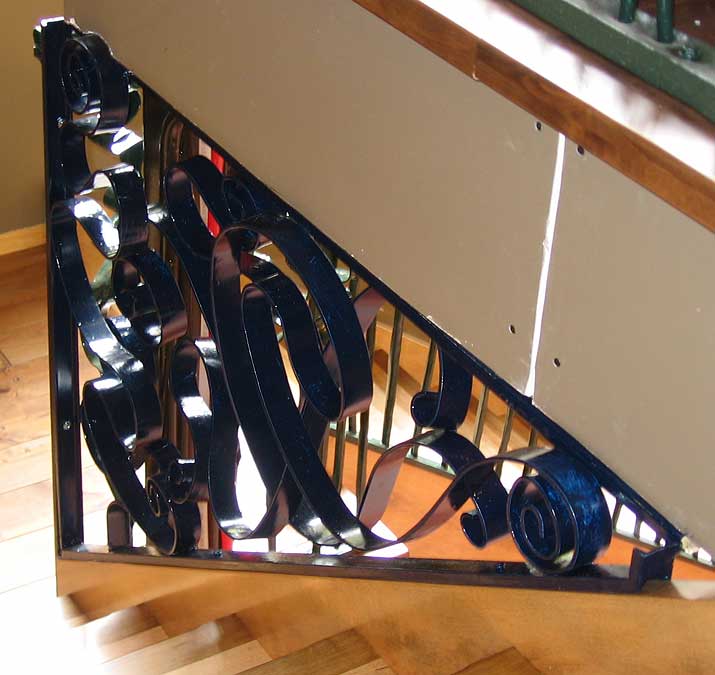
'Beach - Breakers'
This specific panel flows from the left hand side of the Undertow piece, covering the triangular gap as the basement stairs move on to the main floor. There is a similar panel (but not identical) on the opposite side. The elements here actually flow from front to back in a more fluid fashion than on the Undertow section. |
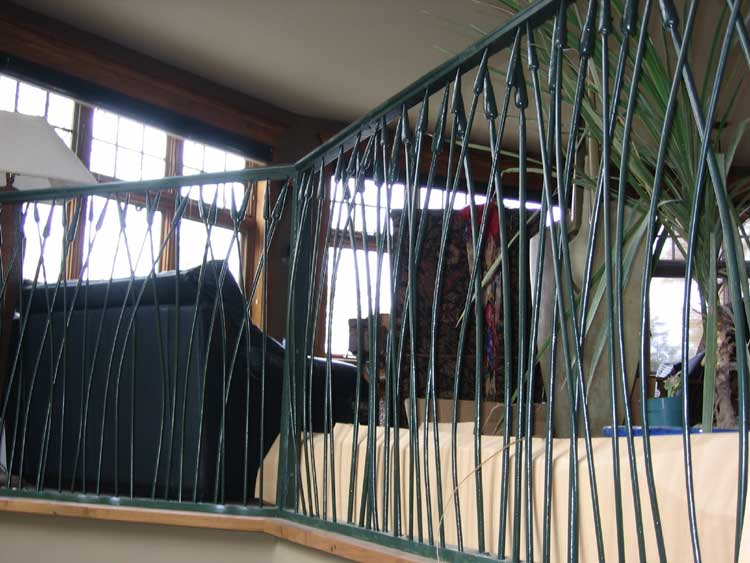
'Shore - Rushes'
Coming up with a suitable design for the long length of railing along the main floor proved a challenge. In the end a simple arrangement, using slightly curved lines, was the solution. Each of the spread bundles rods end is stylized rush heads. The front set are of 1/2 round, the rear of smaller 3/8. The overall effect is one of increased depth. As well as being offset from each other to close the gaps, the rods curve forward and back slightly off the centre line of the plane of the railing. |
 |
 |
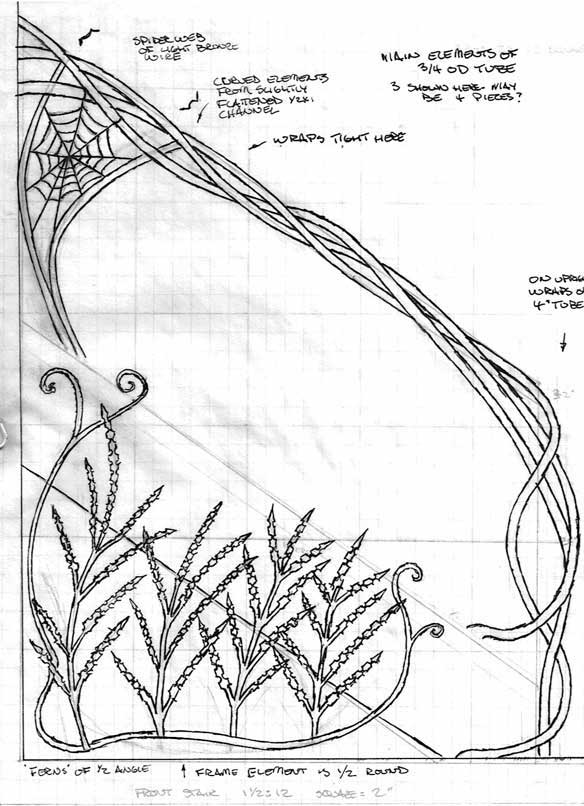 |
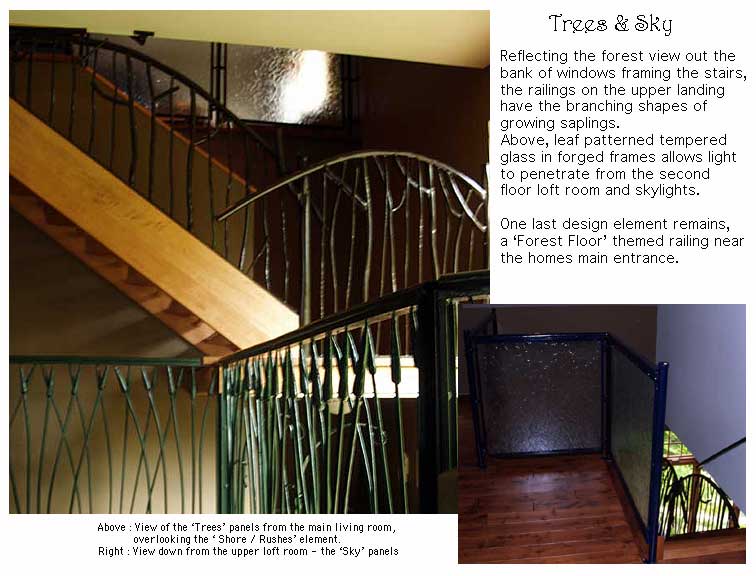
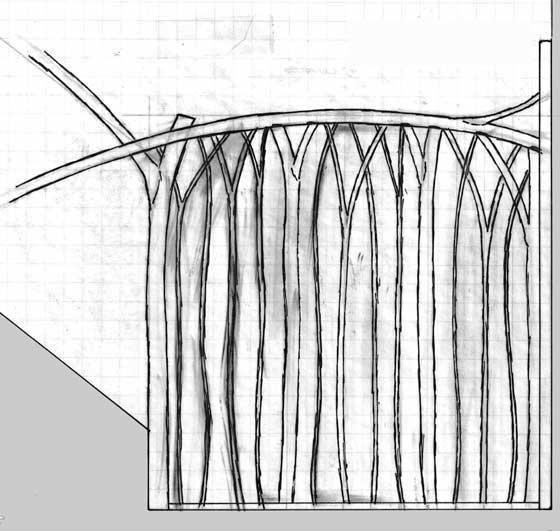
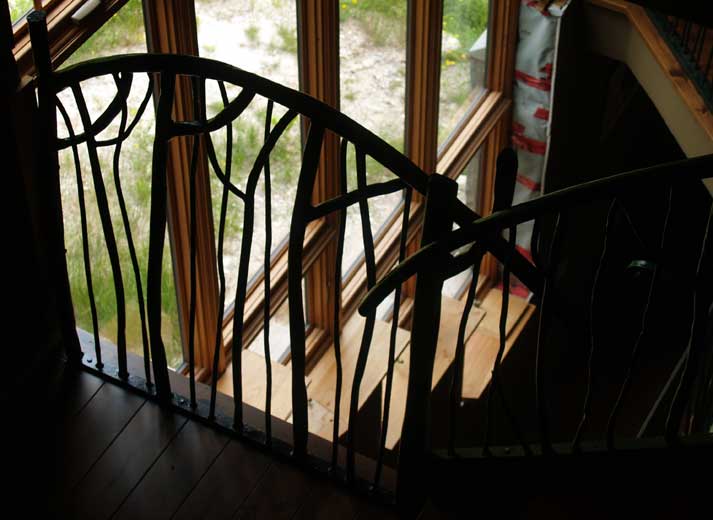
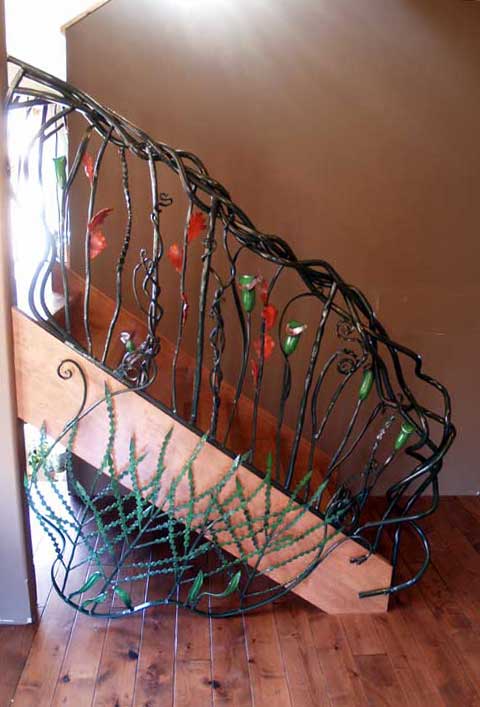
| In keeping with the overall concept, the section of landing and stair rail from the 1st to second floors would be 'Forest'. I had the most trouble coming up with an acceptable idea. I had been playing with the image of the middle section of a grove of saplings. The problem was coming up with something that kept to the open feel of the space, yet conformed to the building code provisions. Finally it was a fast sketch by my wife Vandy that sparked the finial layout. | As detailed below, the concept for the 2nd floor balcony area was to use patterned glass panels. For that reason, the designs here were dictated largely by functional concerns. | I wanted the last panel, a short railing at the base of the main floor stairs, to be more of a show piece than the other panels. It would be visible immediately from the front entrance, and none of the other panels were then in view. In keeping with the overall theme, this panel was the 'Forest Floor'. Inspiration came from ferns and plants just outside in the woodland surrounding the house. |
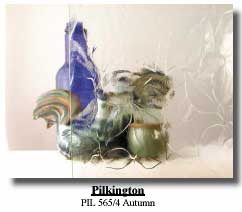
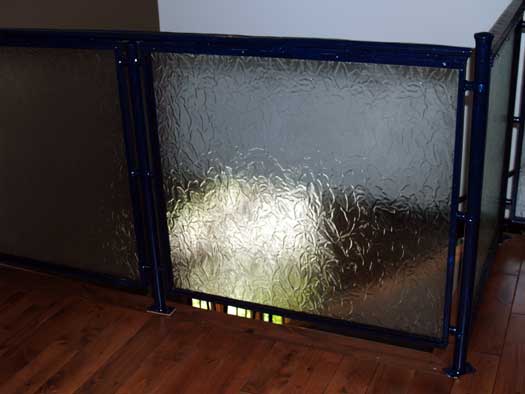
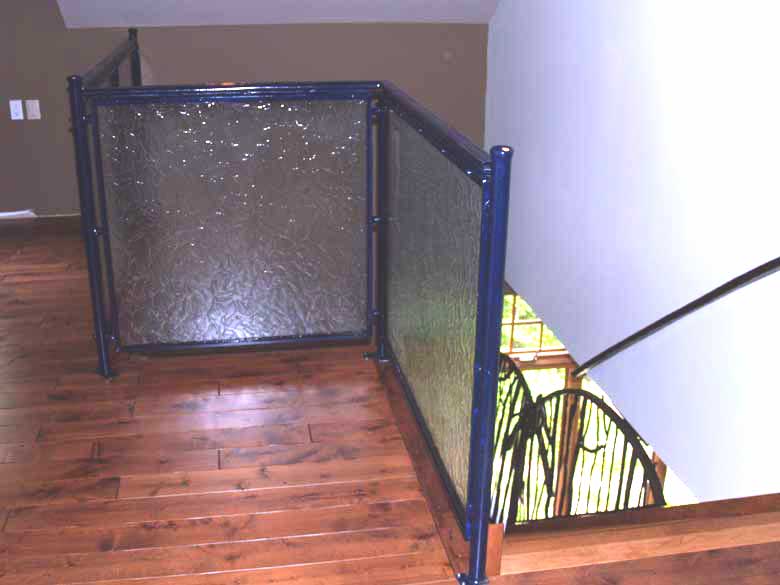
| The last part of the sequence, Sky, is based around the
use of translucent patterned architectural glass. One of the
considerations here was to provide as much light as possible
from the windows and skylights on the loft room at the top
of the second floor stairs. A number of potential patterns were considered from the 'Pilkington' product line. Although often suggested, this marks the first time I have worked with an installation using tempered glass panels. This proved to be more a structural problem than a design one. The glass is contained first in a frame made of channel, set with silicone. These individual panels then slide into a second set of structural frames, which bolt and screw to mount to each other and into place against floors and walls along the edge of the upper floor. The supporting posts are the only forged elements, made from heavy 1 1/2 inch pipe. These are slightly flattened, then spread open and tops and bottoms. The tops are finished with a dished cap, creating a mushroom effect. |
 |
|
Production Phase Because of the scope and size of this project, the initial deposit was considerable. Both because the customers were truly interested, and to provide them with some measure of 'how I was spending their money' I made extensive documentation of the work in progress via blog postings. I also filmed a couple of video segments of how some of the individual elements were physically created. Rather than repeat all that documentation here, I refer those interested to the individual segments : |
|
Forging
the BIG TIME Forging
Elements - Tools for Rushes '...but
can you DRAW it?' 'That
Don't Look Like the Drawing' Snatched from the Fire
Undersea to Shore
'Trees'
Trees and Sky
'Forest Floor' |
Forging Elements - Rush Tips for 'Rushes' panels |
Forming the Reversal Curves for 'Undertow' panel |
Forging Elements - Kelp for 'Undersea' panels |
|
Use of Colour : As was mentioned, it was decided to use darkened down solid colours for the various panels. It was felt the repeated use of black would both make the individual segments visually too heavy, and also the entire project less interesting. To that end, a deep green was used for both the Kelp and again for the Rushes sections. A very dark blue was used for the Breakers and Undertow panels, then repeated on the frames of the 'Sky' set. The two heavy support beams in the basement to main floor are a deep brown. For the show piece 'Forest Floor' more realistic colours were applied to the flowers and leaves within the panel, plus use of highlight colours over the dark green base. Kelp End Post : This element was considerably more complex in the end than was originally planned. It turned out the problem of 'you can draw it - but can you make it' reared its ugly head. In the end it was just not possible to forge the individual leave components into the tight curves required for the spiral basket shape of the concept drawing. This was solved by forging a second set of kelp frond elements out of smaller angle, and creating a basket within a basket. The end result is actually even better than the concept. The extra elements produce a second level of complex detail within the larger form. Forest Floor : The lower portion of this panel needed to be removable, to provide occasional access to the space below the stairs and landing. The solution was a separate panel, composed of the fern elements within a curved frame (forged from flat bar). This hooks on to tendril elements extending from the railing. From the start, it was intended to incorporate natural plan forms from the surrounding landscape. A number of test pieces were produced before the final selection was made, and these where worked into the actual layout. This process was more organic than pre-planned. Individual upright elements were 'forged to fit' within the larger framework. One departure from the standard was the use of a twisted bundle of smaller tubes for the hand rail, in place of the 1 1/2 diameter used elsewhere in the series. An important aspect of this panel was that it would be in direct view from the front door - and so needed to make a visual statement to the visitor to the house. |
|
Final Installation Note, the quality of some of these images is not ideal! |
 |
 |
 |
 |
 |
|
'Rushes' from one end
towards basement stairs.
|
'Rushes' looking back
from basement stair.
|
'Rushes' end post
|
'Breakers' right hand
side
|
 |
 |
 |
 |
|
'Breakers' left hand
side
|
'Undertow' from
basement stairs
|
Detail of 'Breakers'
to 'Undertow'
|
Transition of 'Kelp'
to 'Breakers'
|
 |
 |
 |
 |
|
'Kelp', top of stair
railing
|
'Kelp' looking up
from basement over stair
|
'Kelp Post' from
basement
|
Detail of the 'Kelp Post'
|
 |
 |
 |
 |
|
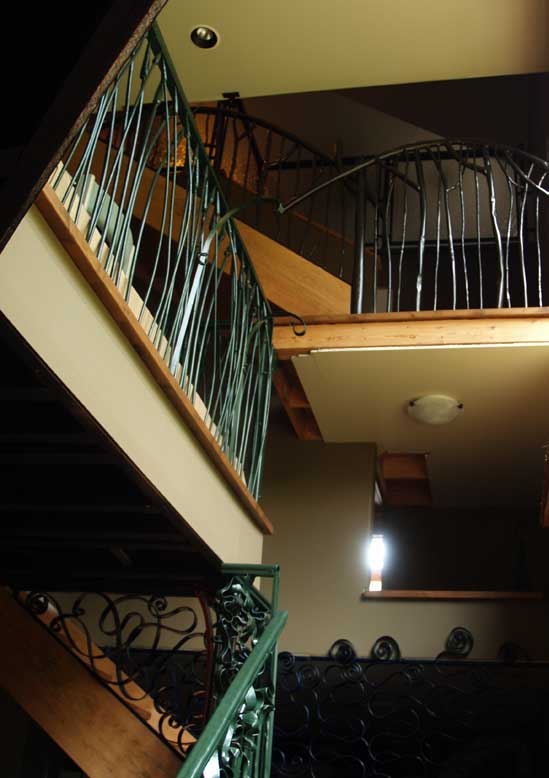
'Trees' from living
room
|
'Trees' view from the
stairs through the windows
|
'Sky' panel from the
loft room
|
'Sky' panels viewed
down the stairs
|
 |
 |
 |
|
|
'Forest Floor' as
seen from the front entry
|
'Forest Floor' seen
on the stairs
|
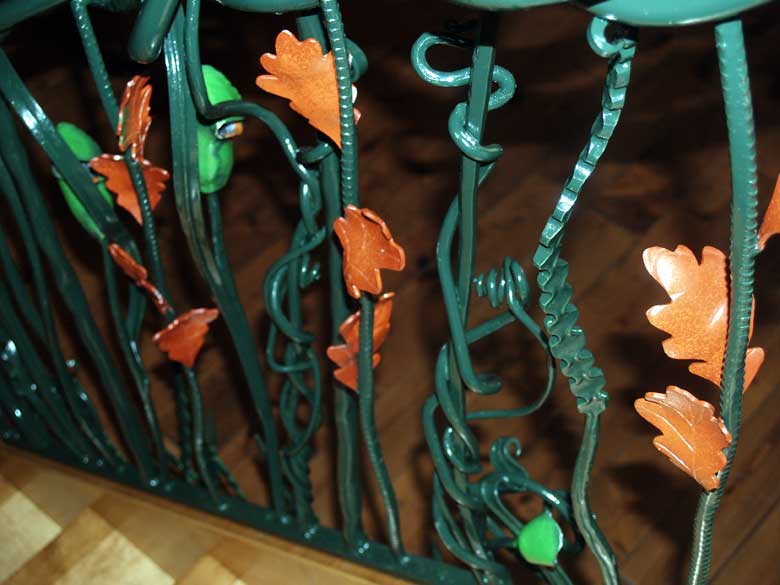
'Forest Floor' detail
showing colours
|
