 |
 |
 |
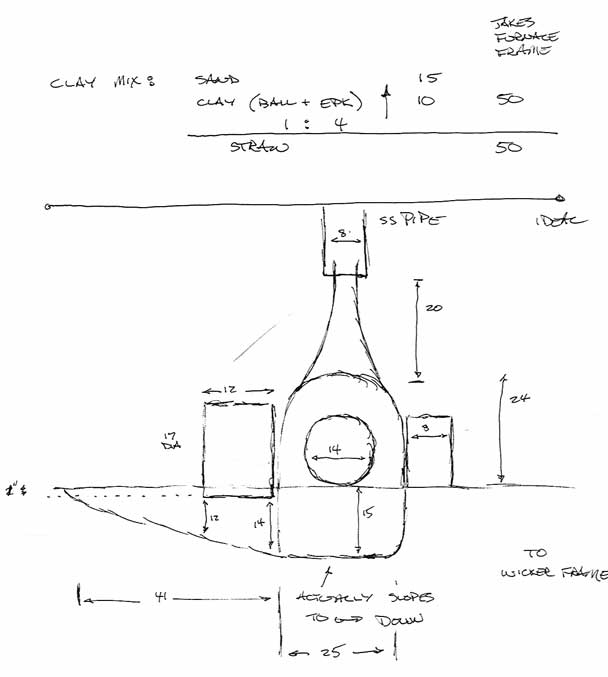
| Cross section of the initial internal supports | Cross Section of the proposed furnace | Plan View of the furnace |
One of the main experimental projects undertaken of this annual working retreat of the Early Iron Underground was the construction and firing of an African styled furnace under the direction of Jake Keen. On last year's adventure in Burkina Faso, Jake, Lee Sauder and Mike McCarthy had seen the remains of a 'bell plus shaft' traditional furnace style in Southwest Burkinabe. These are passive draw furnaces, using multiple ceramic tuyeres within large arches located around the furnace base. They are also slag pit furnaces, where hot slag accumulates into large blocks which slowly descend into a vegetation filled hole dug below the furnace base. The original furnaces were partially buried, so the exact lower construction is a matter of some guess work. Of course the upper shafts were also all eroded off, so the exact working height is unknown as well.
In initial conversations about this type of furnace, the assembled group laid out the following experimental variables:
1) How far would the tuyeres extend into the center of the furnace at the start
of the firing?
2) Are the tuyeres slowly pulled outwards from the center as the firing sequence
progresses..
3) .. Or are the tuyeres allowed to melt away as the interior heat develops/
4) What temperature gradients will be measured across the inside of the furnace?
5) How will the blocking and unblocking of the individual tuyeres effect the
burning of charcoal / internal temperatures?
6) What is the actual location of bloom development (central or before each tuyere group)?
7) What is the ideal fill level for charcoal within the furnace?
8) What is the ideal method and rate for ore additions?
9) What is the best size and number of arches?
10) What is the best number of tuyeres per arch?
11) What is the best proportion for individual tuyeres (length, open and furnace diameters) ?
12) What will prove the ideal consumption (ore and charcoal) rate?
13) What is the required top stack height?
14) How long would a smelt sequence require?
15) What would be the best way to physically construct a massive clay structure?
16) What would be the best angle to set the tuyeres?
|
|
|
| Cross section of the initial internal supports | Cross Section of the proposed furnace | Plan View of the furnace |
 |
As a slag pit furnace, the design called for a long trench off one quadrant,
intended to drag out the projected massive slag block. The core of the furnace
is framed with saplings, we used sections cut from an old water heater to
frame the openings where the clay tuyeres will be inserted later. Digging
the lower pit and the side trench proved to be a major effort. Believe it
or not, there are even MORE rocks in the 'soil' at Geminal Ironworks than
the ground in Wareham. Above the withy frame can be seen the length of stainless steel pipe used for the chimney. This was hung in place, suspended by the metal framework supporting the roof of the smelting area. The pipe extended at least 10 feet above the top of the furnace shaft. |
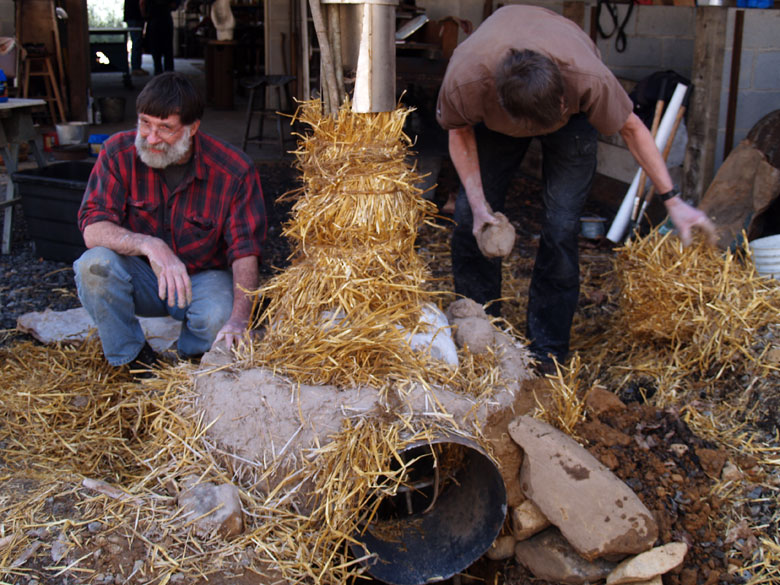 |
The construction of the furnace is clay cobb, mixed with chopped local
plants (a wild variant of broom straw). Jake is inserting a layer of straw
between the frame and the applied clay mix. This is to allow the clay
to shrink without cracking (we hope) as it dries. Over this was laid another
2 inch layer of straw, then a further 4 inch layer of clay like soil.
The base was then revetted with stone and back filled with earth. These
layers served to support and keep the bottom 18 inches or so from slumping.
Sheldon Brower (L), Jake Keen (R) |
 |
This is the construction of the furnace at the end of the main structural build. At this point the steel hoops supporting the arches are still in place. You can see the dome of the furnace proper extending to the shaft. A natural draft furnace needs a certain minimum height to create the air flow dynamic. (Our combined brains were a bit fuzzy on the details here, best guess is at least 6 feet of height is required.) Not seen in this image is a sliding hatch cut into the base of the pipe that allows for feeding ore and charcoal at the bottom edge of the pipe. In Africa, the stone steps seen in the left foreground would be used to add new material. |
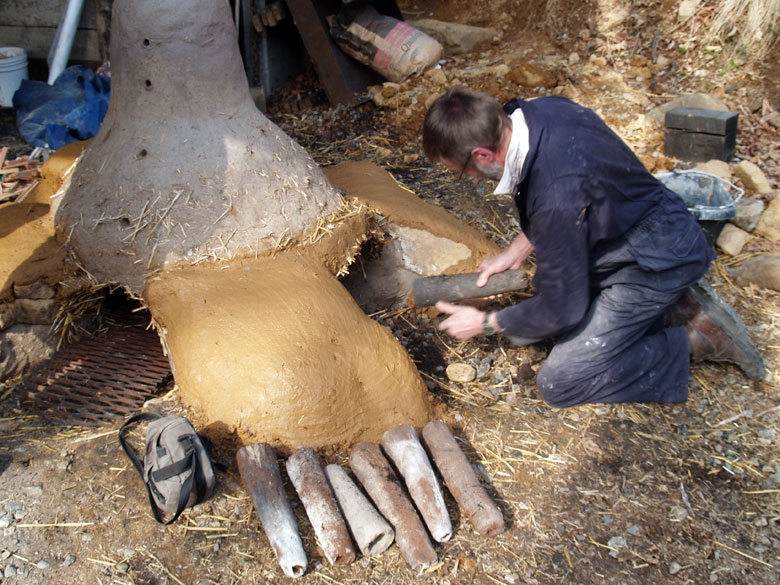 |
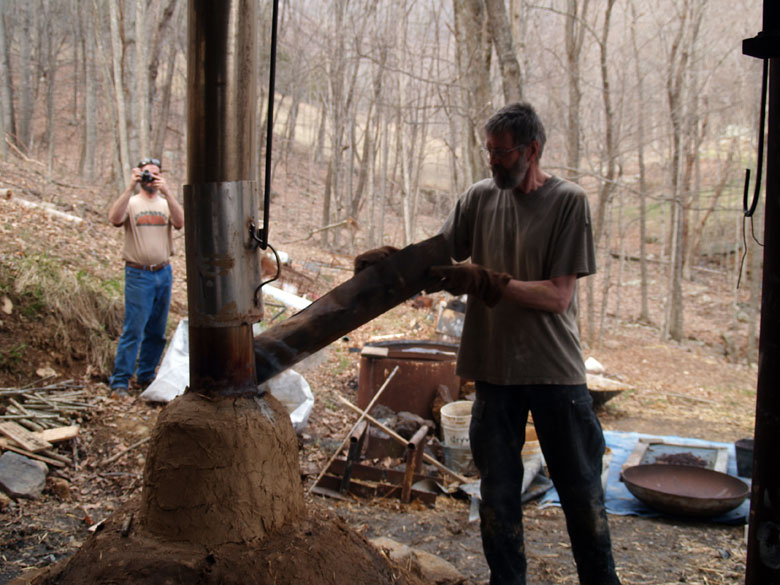
This is the furnace, part way through Jake Keen 'tarting it up'. The core
structure here is seen as the gray colour clay. On top of that is a second
clay layer, this dug straight out of the back behind Lee's workshop. Jake
plans to extend this covering over the entire structural surface. Jake is seen here checking one of the clay tuyeres he has been making for rough fit. The plan is to have 16 of these, four for each of the quadrant arches. The plan calls for these to be set at a pronounced down angle (-45 degrees), the tips placed close to the centre of the furnace. The individual tuyeres are each about 18 inches long. The interior diameter on the inside end are about 1 inch or so. The outside interior diameters are about three inches. Jake had a lot of trouble getting a good working clay mix for these. He also was hampered by generally cold and damp weather. The end effect of all this is that the individual tuyeres vary considerably in size and shape. As the construction of the furnace was finished, and a small wood fire had been built in the interior. Over the course of a day, this fire was fed with larger and larger amounts. Later in the evening, the furnace was packed with stove wood pieces, metal plates put over the arches, and left to burn out over night. |
Preparing for Smelt
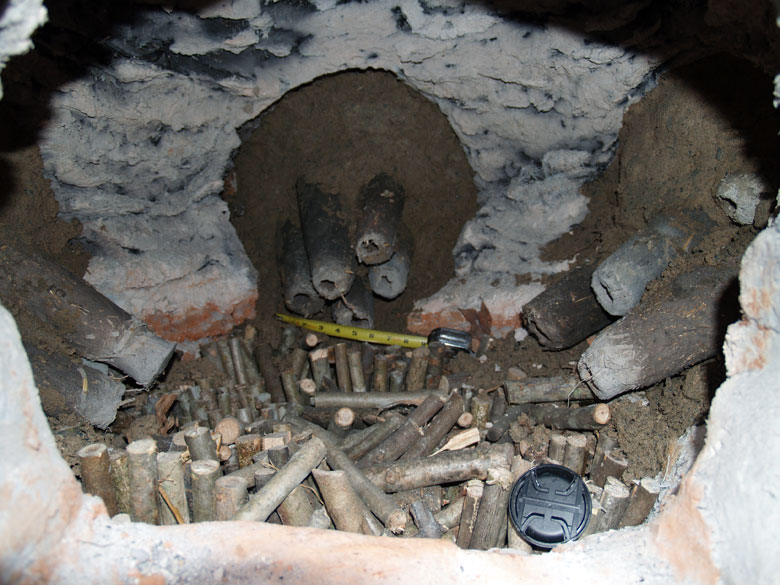 |
The next morning the interior pit still contained hot charcoal. The
pit was filled with vertically standing green sticks, cut to roughly 12
inches long. These will support the initial combustion, then the developing
slag bowl. As more and increasingly fluid slag is produced, it will run
down into the gaps between the sticks. Eventually the building mass of
slag will slowly burn out the tops of the sticks allowing the block to
sag into the pit. If all goes as its supposed to (??) this keeps the developing
bloom at the ideal placement inside the furnace. |
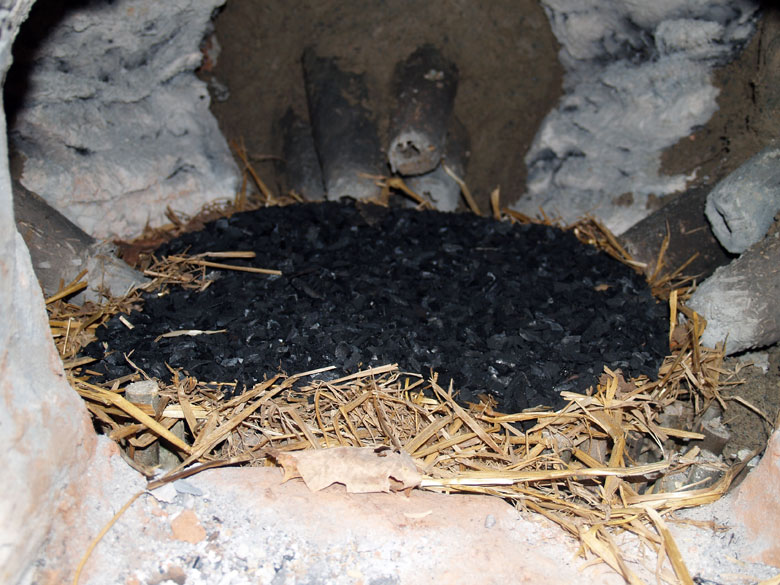 |
This is the same shot, with the bed of the furnace established. A thin
mat of broken straw covers over the stick ends, topped with a thin layer
(about 1 cm) of charcoal fines. Its fully expected that the ignited charcoal
will establish its own working level. The layers seen function to keep smaller
pieces of burning charcoal from falling straight down between the sticks
into the pit. |
 |
Once the first layer of tuyeres was placed into the final arch, an initial spit wood fire was started in the interior. Finally the remaining tuyeres were placed and the quickly this arch was sealed. |
 |
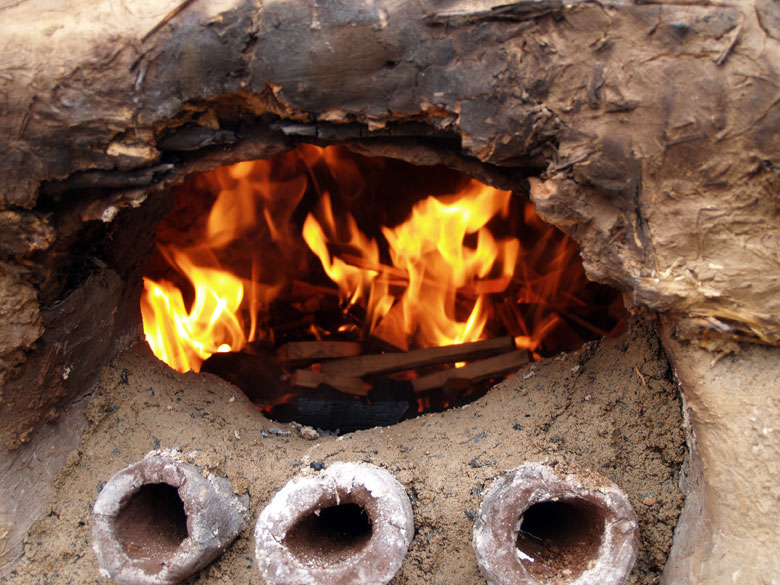
At that point, the furnace was charged with small pieces of dry wood.
About enough to fill a standard garbage pail had been pre-split into roughly
1 x 1 x 10 - 15 cm long splits. On top of that material was added larger
flat pieces mostly the same length, perhaps twice again as much material. The heat created operated the furnace like a big charcoal retort at this phase, resulting in considerable smoke from the stack. This certainly indicated that the tuyeres were in fact drawing enough air to produce a significant natural draft. Jeff figured it was more than time enough to ignited the exhaust gasses, touching these off with burning paper at the lower charge door. The effect was quite dramatic.. |
 |
Once that wood fuel was obviously fully ignited, rough charcoal was added
to fill the lower chamber. Of course some of the wood had burned away by
that point. Still, it took about two 40 lb sacks of charcoal to fill to
the ëneckí where the shaft starts. Jake Keen, the smelt master for this experiment, is seen adding charcoal via the charge door in this image. The charging cycle of 5 lbs of broken / sorted charcoal and 5 lbs of roasted / crushed Lexington rock ore was started almost immediately after. |
 |
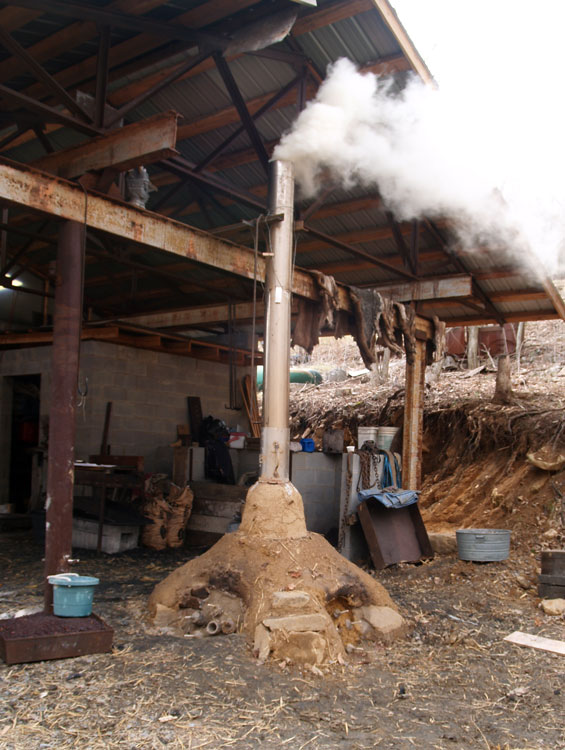
The furnace would settle down to a fairly uniform consumption rate of 5 ore plus 5 charcoal roughly every 10 - 15 minutes. Of course there would be variations on this! Twice the furnace almost stalled out, with internal temperatures obviously dropping and consumption greatly increasing. With a total of 200 lbs of prepared ore on hand, many long hours of furnace tending were expected. The initial fire had started about 2 pm on Tuesday, it was initially expected to take 24 - 36 hours to run the complete smelting cycle. Details of the smelting cycle are available in the standard chart form. One effect that came to be relied on is seen above. As each individual
charge was fully ignited inside the furnace, the stainless steel stack
pipe would start to glow a dull orange to red along its whole length.
(This image above is hand held at about a half second exposure.) |
 |
The next morning, individuals arrived back up to the work site at random
times - largely based on how much sleep they had gotten the night before.
Jake and Lee were first on the scene, but it was about 10:45 AM before serious
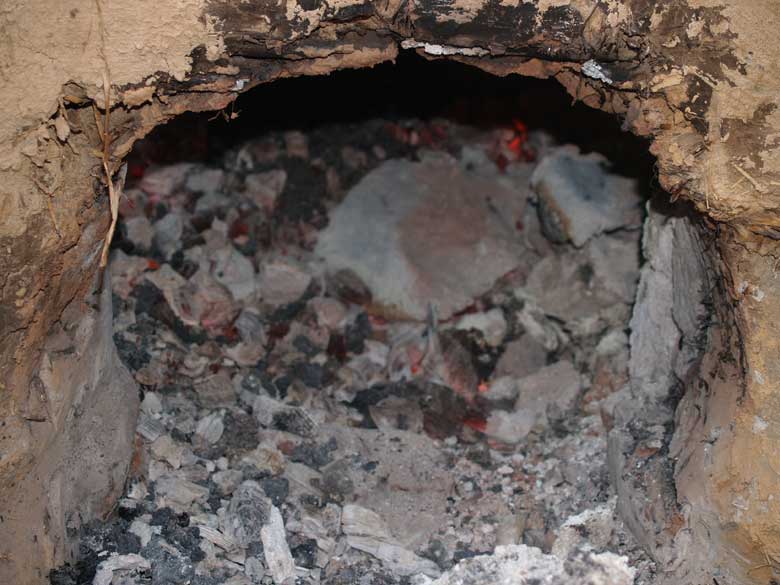
work on opening up the furnace started. This is an 'down the kilt' shot, taken from inside the loading gate, down the shaft into the hot base of the furnace. You can see a mound of charcoal towards the centre still remaining. The hot spots to the left and right corners mark the location of the east and north sets of tuyeres (respectively). |
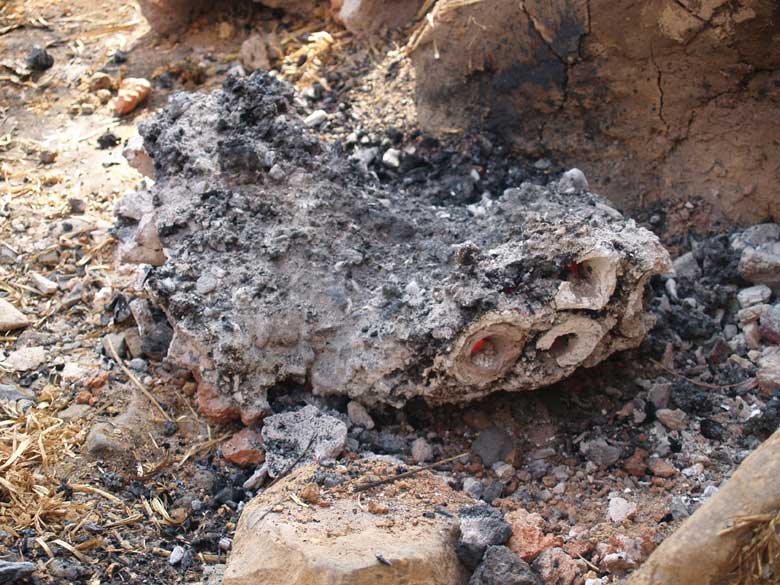 |
The first slag block to be pulled free was the one to the larger north facing arch. The block is seen here rotated 90 degrees CCW from its initial position. The bases of the clay tuyeres are seen embedded into the slag, and broken off at the point they would have been surrounded by the initial loose clay packing to seal the arch. The glow seen in the interior of the left most tuyere reminds you that this block is still orange hot in the centre! |
 |
This is a view down inside the furnace from that same north side arch. The larger masses seen on top of the charcoal are actually pieces of the interior wall of the furnace, which fell down on top of the remaining charcoal and slag blocks. This primarily due to the whacking and prodding required to pull the slag block free. You can see that the base of the furnace has slumped down, the slag blocks burning down into the supporting sticks to about even with the ground level. |
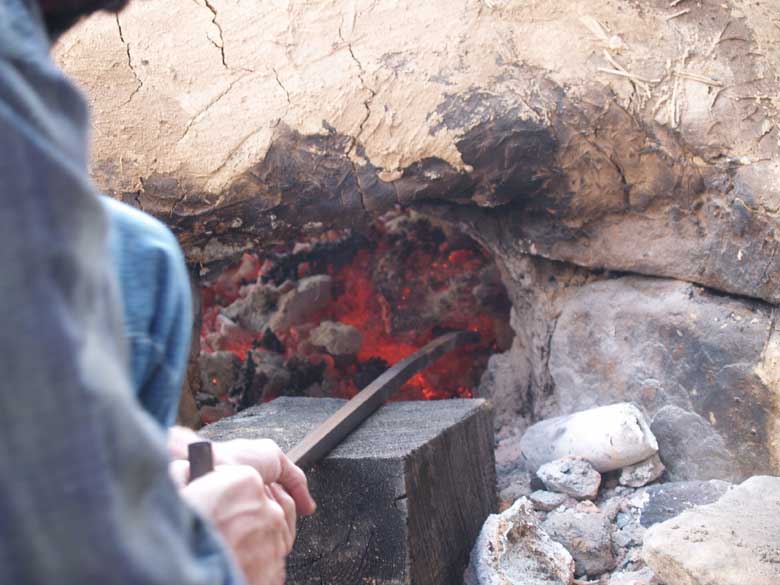 |
Here, Jake is working on prying up one of the slag blocks from the west arch. Some better indication of the heat can be seen. In fact, in the couple of minutes required for this operation, the wooden block used as a support here would catch on fire due to radiant heat. (Although it was a good 18 inches back from the furnace.) |
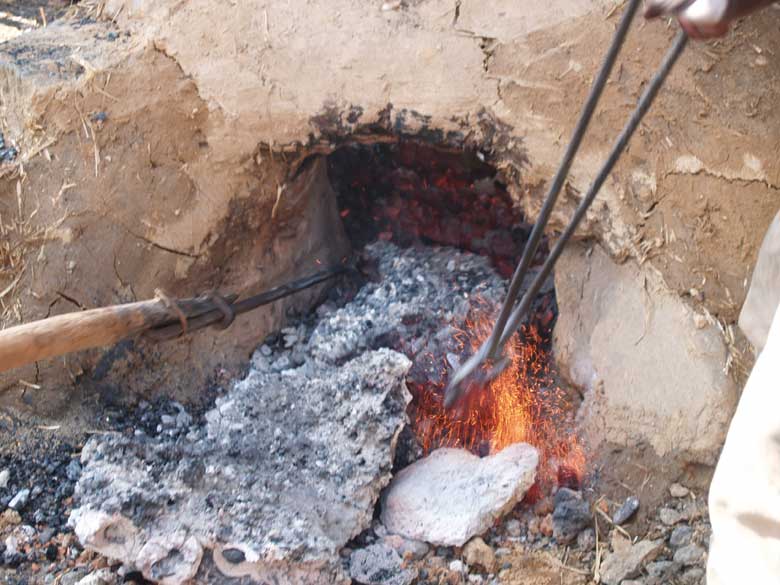 |
Here you see that with Jake on tongs and Lee assisting with a bloom hook, this second slag mass is extracted. Again the bases of the broken off tuyeres can be seen in the lower edge of the block. |
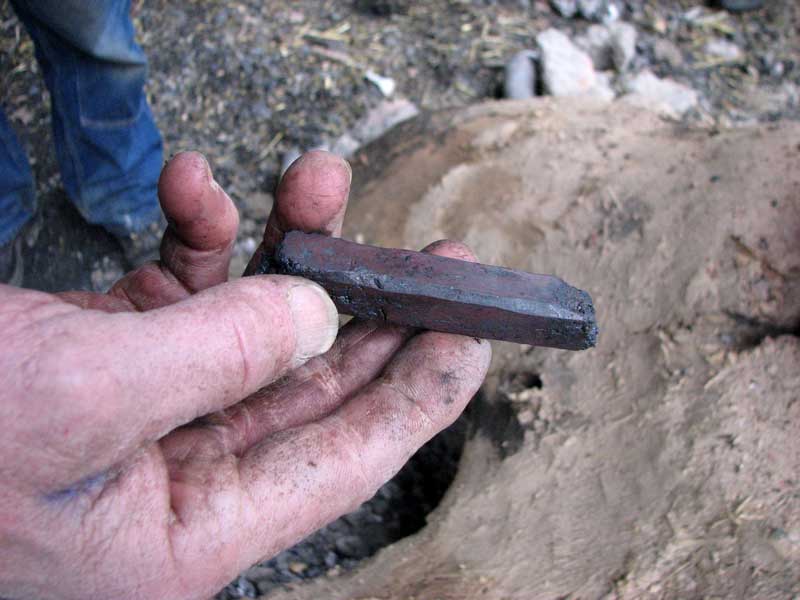 |
Although there was some expectations of a large bloom mass (for Jake
at least) no large bloom was found. A number of smaller, roughly tennis
ball sized, fragments were broken out from within the various slag blocks. (Image by Jesus Herandez) |
|||||||||||||||||||||||||||
TOTALS
|
It was generally felt that the ore charging method used was not optimal.
(Individual charges were added as 5 lb 'slugs' of material, rather than
being scattered evenly through the added charcoal.) It was clearly evident
that the best level to maintain inside the furnace was 'just bellow the
bell'. Each time the fill was allowed to rise into the shaft itself, the
ore charges effectively blocked the flow of air up from tuyeres to chimney.
This in turn reduced ignition, and so seriously dropped internal temperatures. The addition of more tuyeres in each arch might have improved possible air flow. For most of the smelting cycle, the furnace was operated with all the tuyeres available open. More tuyeres might have allowed for better control of air thus temperature. The construction of such a massive furnace certainly suggests a different use pattern than what most of the participating team normally undertakes. With smaller, less resource intensive smelts, the furnaces are considered limited use, almost disposable. A large amount of raw materials were expended - with little positive result. This certainly suggests a very steep learning curve, each step extremely labour and materials intensive. |