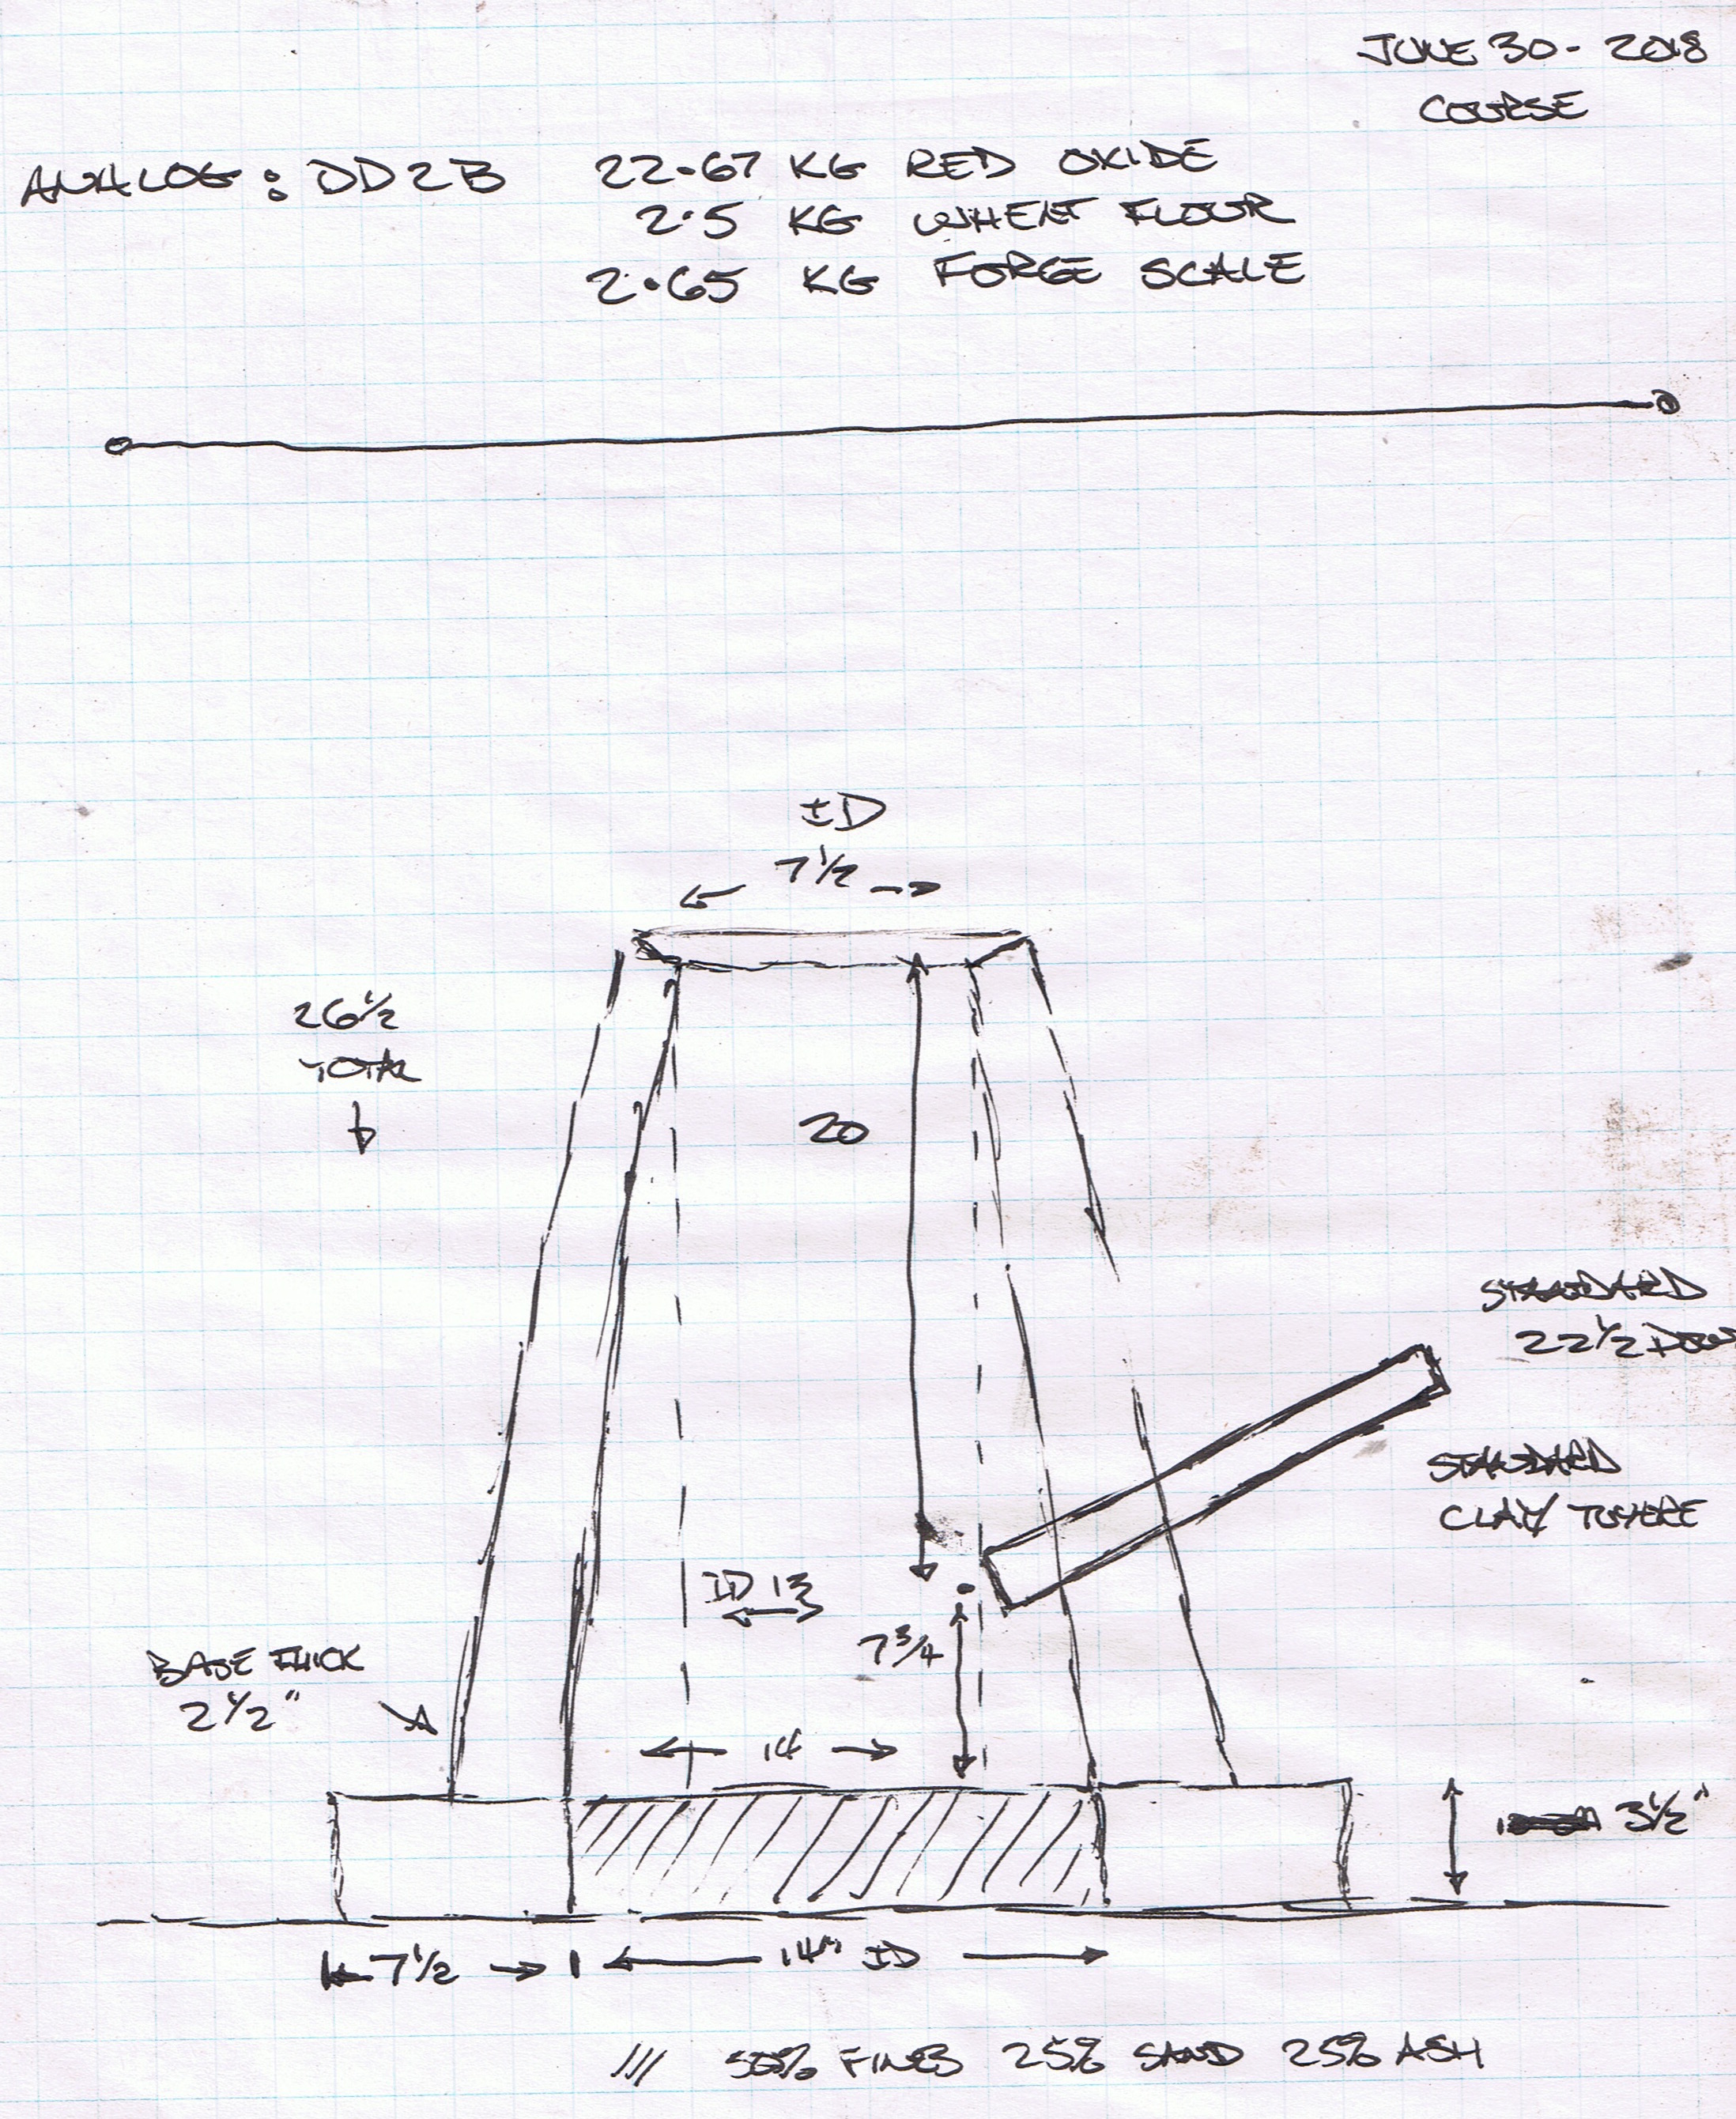
Furnace Layout - note measurements in inches
Iron Smelting in the Viking Age :
Course
June 30, 2018
Smelt Team:
William Short, Barbara Wechter & Matt Card (of Hurstwic)
Keith Wachowicz
Instructor : Darrell Markewitz
As you can see on the 'Courses'
overview, one of the specialist programs I offer is 'Bloomery Iron
Smelting'. As this is a very 'on the fringe' interest, I
normally only offer this program typically every second year.
Further, the program is complicated by the raw materials cost
(over $400 worth consumed), so there has to be at least TWO paid
registrations for me to proceed. This year, I was contacted by
Keith, who was determined enough that he would fly in from
Edmonton (!!) to participate. With that kind of enthusiasm, I
committed to run the course. Ongoing conversations with Bill Short
of Hurstwic lead to him
registering two, eventual three additional people. (The Hurstwic
team drove up from Southburough MAS.) Because all of these
participants were keenly interested in specifically Norse / Viking
Age methods, the normal use of the simpler 'Econo Norse' design
was shifted to a historically based 'Norse Short Shaft' styled
furnace.
This smelting effort marks the 77th time I have personally ran a
bloomery furnace, so the layout and process is well established,
only the personnel involved presented any 'random element'.
Furnace Layout - note measurements in inches
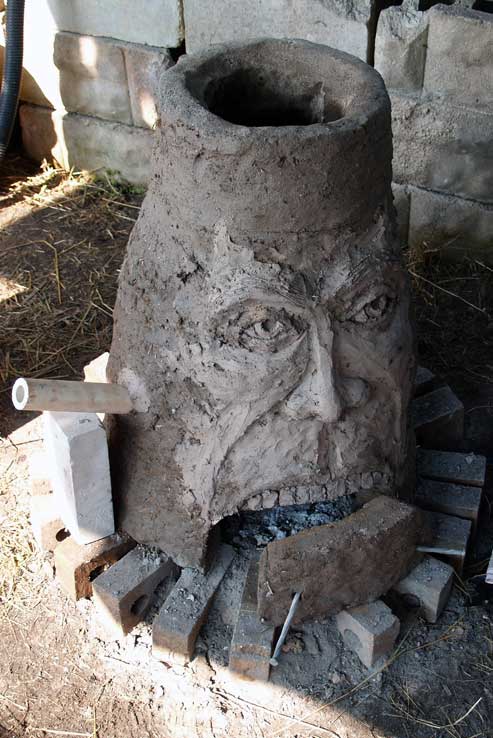
- Clay Cobb Construction : the usual mix of equal amounts
(by volume) of powdered clay, rough sand, and shredded horse
manure.
- Overall size : 30 cm ID / 60 cm + tall
- Tuyere : cylindrical ceramic 'kiln support' - with ID at 20 mm
and overall 20 cm long.
- Tuyere Set : roughly 15 + cm above base, at 22 degrees down, 5
cm proud of interior wall.
- Furnace constructed on a base plinth of standard bricks, the
central space filled with charcoal fines.
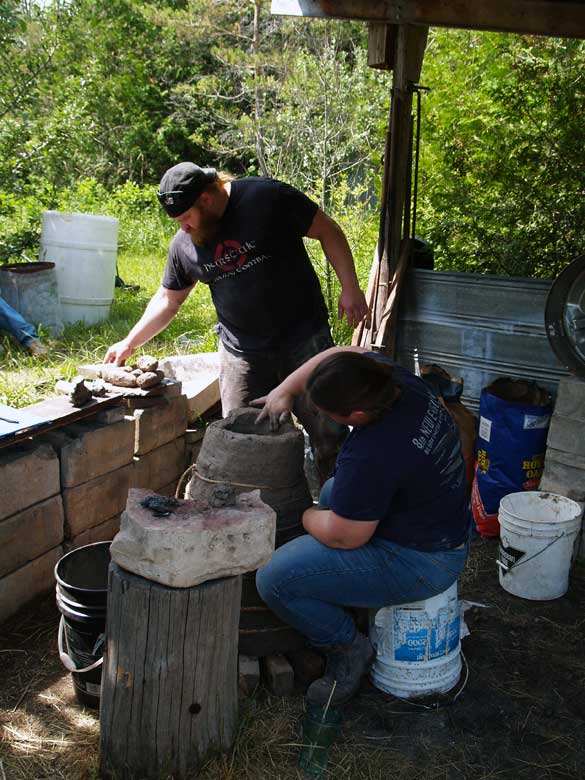
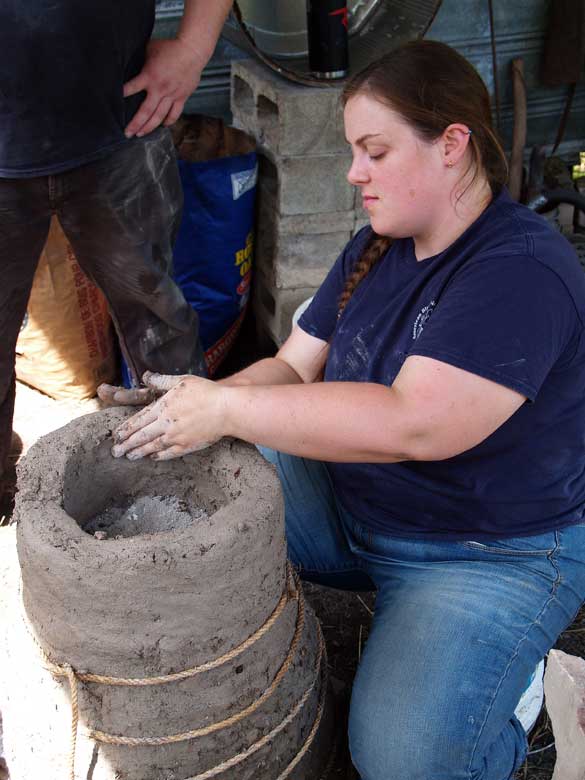
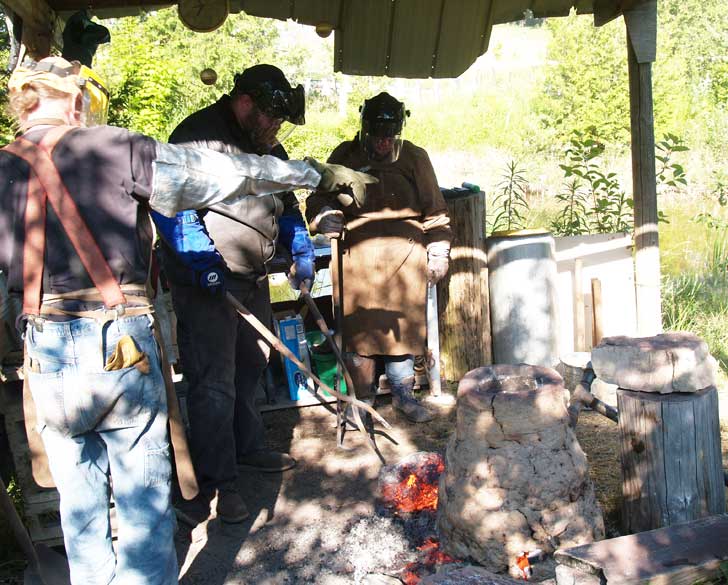
The first course day consisted of mixing clay cobb and building
the furnace itself.
 |
 |
 |
| Matt prepares clay cobb 'balls' while Barbara
builds. |
Detail of the build, rope (attempting)
to contain the lower bulge, with sand / ash packing inside. |
After the evening long drying fire - the body
sculpted. |
As you can see, the shaping of the furnace in damp clay did get a
bit out of control.
In this case, no interior form was used to ensure a consistent
cylindrical shape. Hand building such a large form is certainly
more difficult than it may first appear - especially for those not
experienced with working with wet clay. Eventually, the bottom
spread was at least partially controlled by banding rope around
the exterior. Packing material of 50/50 sand and wood ashes both
helps to stabilize the structure, but also helps to pull some of
the moisture out of the damp clay mix.
The end result was more a conical than cylindrical shape. There
can be certain advantages to this during the firing sequence, but
at the cost of making a top extraction difficult (if even
possible).
While Matt and Barbara undertook the bulk of the heavy work of
mixing clay and building, Keith and Bill were also busy preparing
the other raw materials. There were 10 large bags of charcoal (80
kg total) to break and grade to the required size (between 25 to 5
mm). Also the prepared analog to break into suitable sized pieces
(ideally 15 - 3 mm). All dirty work!
For this smelt, the well proven DD1A analog was used, with
roughly 30 kg prepared:
- 22.5 kg red iron oxide powder (Fe2O3)
- 2.5 kg whole wheat flour (10%)
- 2.65 kg collected forge scale as enrichment (roughly 10 % Fe3O4)
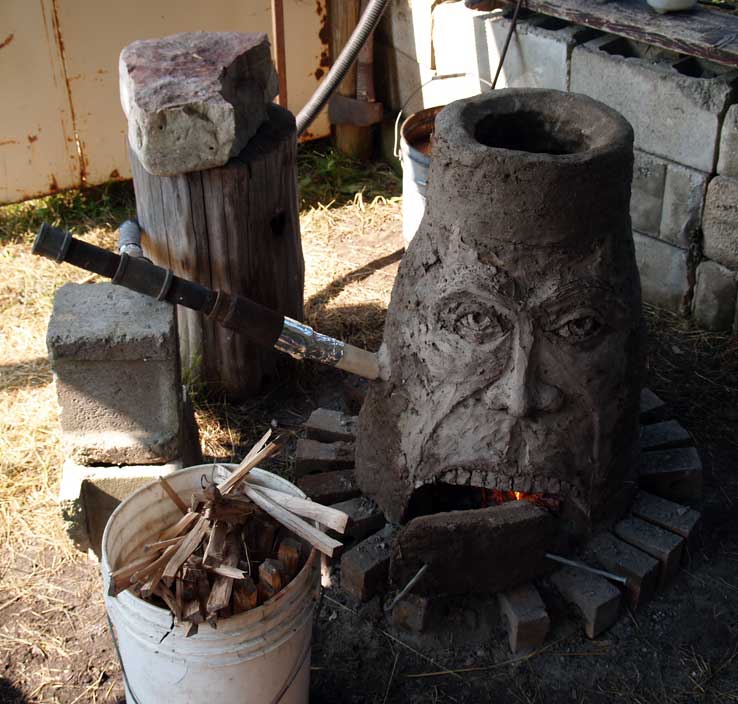 |
 |
 |
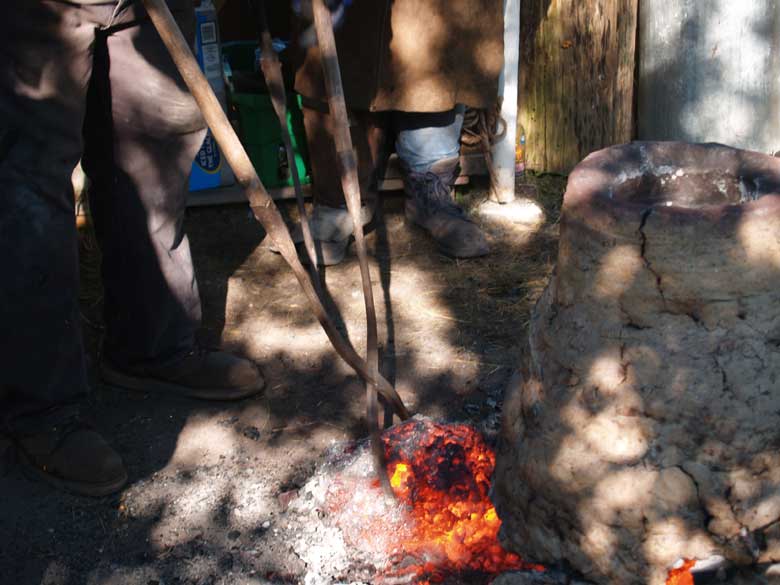
| Smelt Day - starting the pre-heat with wood
splints, with the air system in place. |
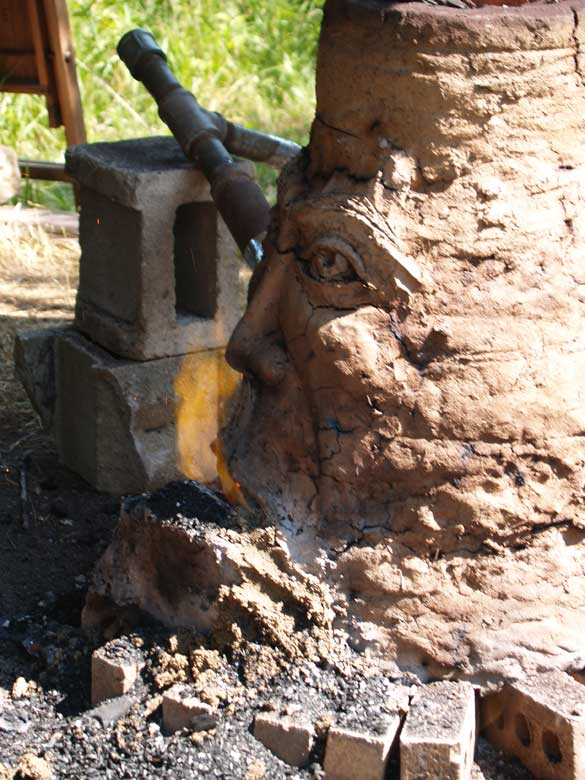
'Speaks with Fire' - about 2/3 through the
smelting sequence. |
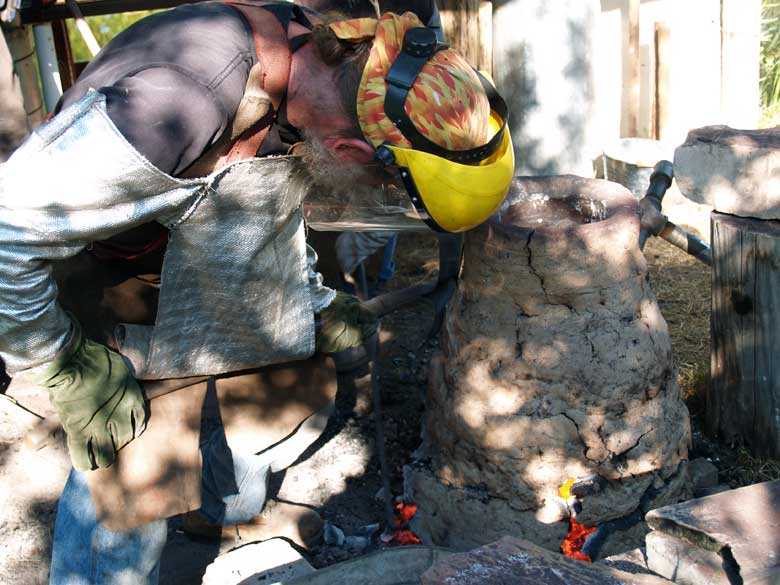
Keith adding ore. |
 |
 |
 |
| Nearing the end of the sequence ('Actually
kind of boring - if nothing goes wrong.') |
Starting the extraction - bracing the front
of the furnace as the arch is pried open. (image by Neil Peterson) |
Matt reaches to get the bloom mass, Barbara
ready with hammer in hand ('Over to the stump' from me) (image by Neil Peterson) |
 |
 |
 |
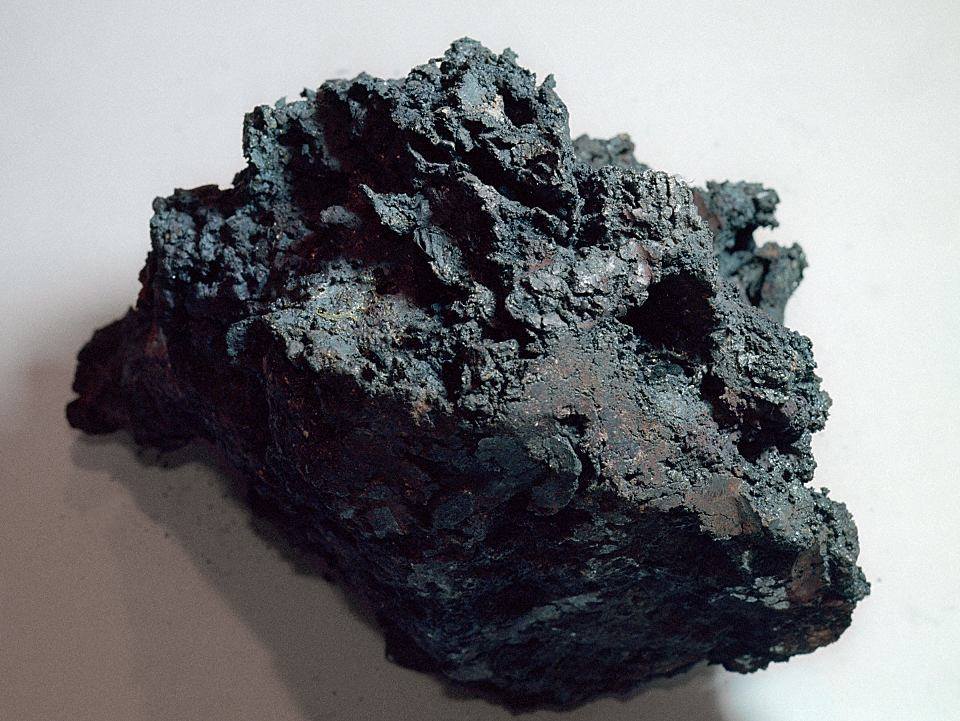
| The mass pulled free, ready to move! (image by Neil Peterson) |
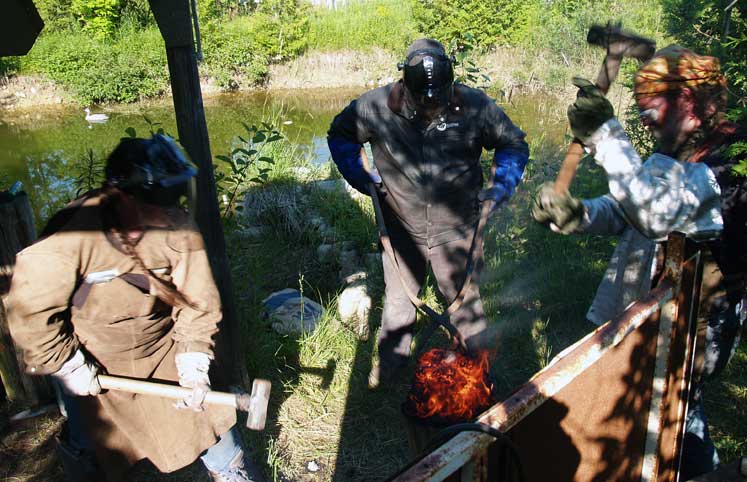
First compaction stroke by Barbara, while
Matt holds. Note amount of slag still clinging to the bloom. (image by Neil Peterson) |
Two strikers at work, still gentle impacts as
loose material is knocked clear of the bloom. (image by Neil Peterson) |
In keeping with the 'Nissen Method', the first charges were not
of ore, but iron rich tap slag recovered from earlier smelts. A
total of 5 kg of this material was charged, as a series of 1 kg
additions. The huge advantage to this method is the fast
establishment of a working slag bowl system inside the furnace.
This done before the more valuable ore is added, typically
resulting in a significant increase in possible yield.
For this smelt, the totals were :
- ore = 29.3 kg
- charcoal = 65 kg
- time = 6 1/2 hours, plus burn down and extraction (another 1 1/2
hours on pre-heat)
The full smelt data is available HERE