For any iron smelting endeavour, an initial
decision has to be made on just how permanent the working
furnace is intended to be. Especially for first time workers,
the best suggestion is to consider the furnace to be disposable,
or at best only likely to survive several smelts and
extractions. It is certainly possible to build larger structures
of stone or even modern refractory, but without extreme care and
considerable experience, damage is almost certain. Refer to the
commentary : Stacking Up.
The simple clay walled furnace illustrated here has become the standard version for work at the Wareham Forge and by the Dark Ages Re-creation Company. The overall design has been derived from dozens of tests of the individual elements. For a general description of the effective operation of this furnace, see : 'If you don't get any IRON'
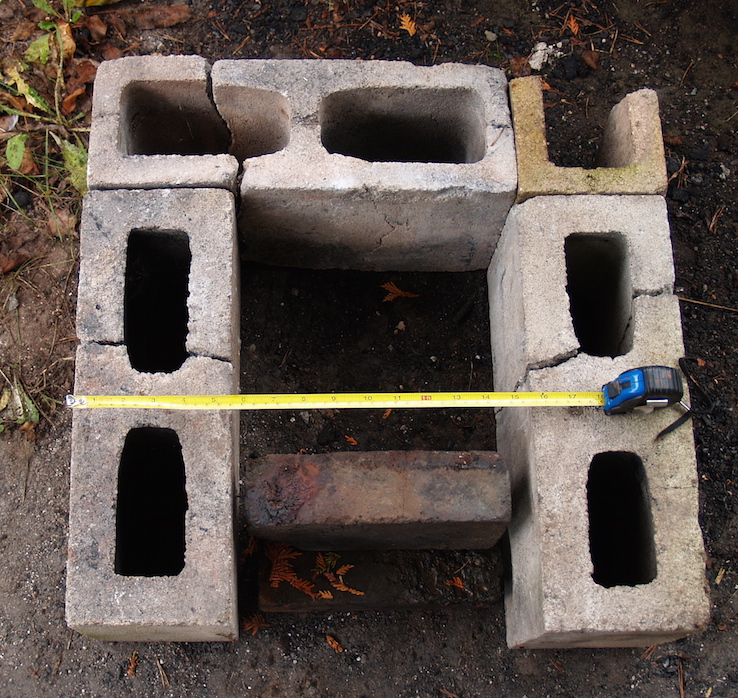
As first suggested by Lee Sauder, there are good reasons to place a test furnace on a slightly elevated base plinth.
This is filled with a light weight and neutral material like charcoal fines or screened wood ash.There are two primary advantages:
In this case, the front extraction arch section was made of three solid clay bricks. The upper most of these would stand up into the clay walls, so this piece was wrapped with newsprint to keep the clay from sticking to the surface. It is worth noting here that all the blocks and bricks had been used a number of times previously. Concrete does not endure the high temperatures of the smelting furnace well, plus these blocks have been stored outside and are subjected to winter freeze and thaw. Even still, these same blocks have served for a number of years.
The easiest (and cheapest!) material for the body of the furnace is clay. A local dug clay may or may not have the temperature resistance required (remembering that internal temperatures will reach 1300 - 1400 C). The found condition of a local clay may also not balance the cost saved over labour required in preparation. In the case of Wareham, the available local clay is a very low firing temperature red earthenware, which is exposed as a hard dry layer, containing many small stones. For those reasons, and simple ease of handling, a commercial potter's clay is purchased.
A number of different materials may be added to improve temperature resistance and durability :
Organics offer different desired qualities at different locations across the wall thickness. On the outside, they will remain, acting as re-enforcing within the clay. In the middle (depending on diameter of the type used) they create hollow strands, allowing some place for water into steam to expand into. In the internal portions, they burn away as the walls heat, creating air pockets as a simple refractory.
Straw as an organic has been found to hold individual applied bricks of clay mix together, but not to blend between individual bricks. It does provide good steam venting. Even chopped to short lengths, straw tends to be sharp and hard on the working hands.
The choice here is a high temperature Kaolin (EPK), rated for a 1750 C melting point. The well proven mix is equal dry volume thirds of EPK, course sand, and shredded dry horse manure. The manure is in the form of last year's droppings, which come apart into individual short strands when the pucks are rubbed between the hands. This mix is blended by hand, then water added to reach a suitable working quality. This amount is a mater of experience, the result needs to be soft enough to easily stick together as added, but no so soft as to allow for slumping as the walls are built upwards.
Because of the often repetitive experimental nature of the iron smelts undertaken here, use of an internal form both speeds and standardizes the internal diameters. In this case, a cylinder originally used for containing helium for balloons had been found, which has a suitable diameter of 25 cm. This is wrapped with a couple of layers of newsprint to prevent clay sticking.
The clay mixture is formed into individual balls about the size of a grapefruit to allow for ease of compacting and excluding any trapped air. These are formed into flattened brick shapes to apply to the outside of the form. As the walls are built up, it is important to firmly blend the edges of successive bricks together, but at the same time use one hand to support the soft clay from bulging outwards. Without this support, the walls will end up becoming thicker, not taller. This form allows for a build of about 20 cm, before it must be lifted clear. At this point, any gaps on the inner surface can be blended closed.
To support the constructed walls, the interior space is filled with a 50/50 mix of dry sand and wood ash. This packing will also pull moisture from the clay, speeding drying. The metal form is covered with new paper and simply placed on top of the packing for the new build layer. If the walls appear to be in danger of slumping, they can be supported on the exterior surface by wrapping a length of rope in a spiral around the outside.
As mixing is being done by hand, typically an amount able to be manipulated also is about the volume required to construct a height of the form used to a roughly 7 cm thick wall. Normally the walls thin out slightly as the build moves upwards, to about 5 cm at the top. Taken together, three batches applied with three shifts in the form yields 60 - 65 cm total wall height.
The ideal is to build the furnace at least several days before the intended smelt, allowing the clay to air dry as much as possible. At this point the packing material is scooped out, the interior surface rubbed to remove any loose ash / sand mix.
At this point the clay should be 'leather hard'. This will allow for the cutting of any additional extraction or tapping arches that might be desired. The hole for the tuyere is also cut, and the tuyere mounted and fresh clay added to seal it tight to the body.
To ensure the furnace body is completely dry, a small fire is lit inside, using a handful of wooden sticks. This process extends over several hours, more sticks being added to keep the gentle heat continuing. A metal cover is placed on the top of the furnace, with a small gap to ensure venting. This acts to hold as much of the developed heat inside as possible. It is important not to heat too fast, or the contained water will flash into steam, and with rapid expansion, can blow off pieces of the interior walls.
In this case, the slow drying fire process was carried out over two hours, the evening before smelt day. At that point the metal cover was placed loosely on the top, and the fire and coals inside allowed to die out.
As can be seen in the image above, right, the impact of a new worker on the build process are clear. The individual applied bricks were only superficially blended together, this largely due to lack of experience working with large clay structures. The image was taken the next morning, early in the full charcoal burn. The effect of venting gases through the cracks can be seen. None of these cracks either vented enough gas to effect the smelting process or caused any failure to the furnace during the smelt. They would reduce the strength of the structure to the point it would break apart during the rigours of extraction.
The simple clay walled furnace illustrated here has become the standard version for work at the Wareham Forge and by the Dark Ages Re-creation Company. The overall design has been derived from dozens of tests of the individual elements. For a general description of the effective operation of this furnace, see : 'If you don't get any IRON'
As first suggested by Lee Sauder, there are good reasons to place a test furnace on a slightly elevated base plinth.
This is filled with a light weight and neutral material like charcoal fines or screened wood ash.There are two primary advantages:
- The ability to easily expose the lower part of the slag bowl for controlling position or tapping excess volume.
- Easing the breaking of the slag bowl to expose and extract the bloom, hopefully limiting damage to the furnace.
 |
 |
 |
| Plinth construction of
1/2 thick concrete blocks |
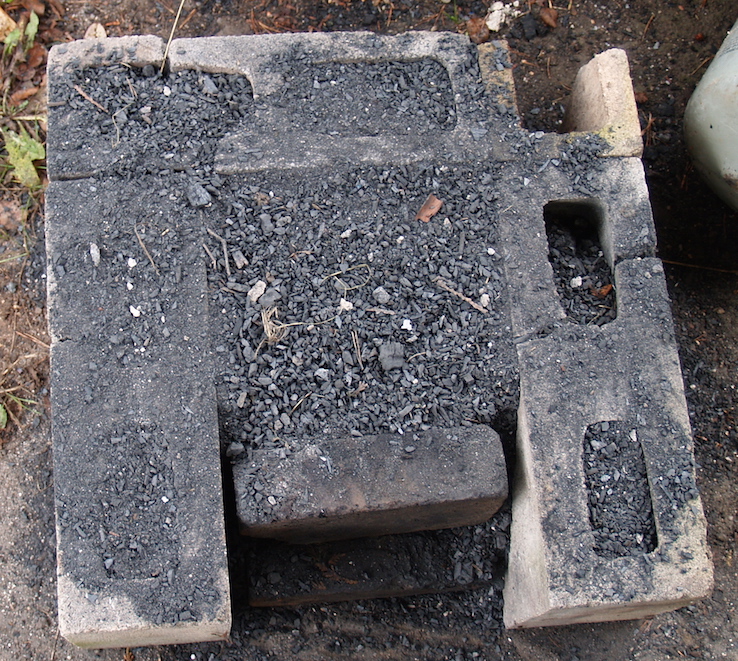
Filled with charcoal
fines |
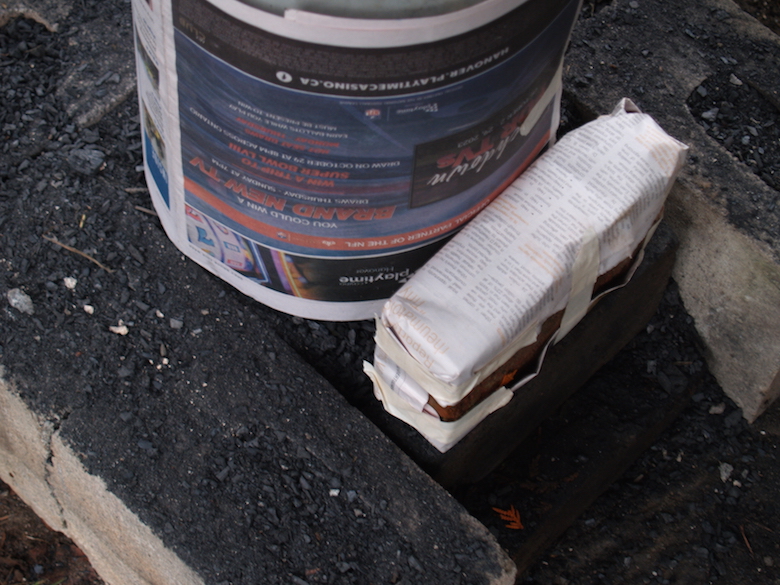
Additional clay brick
wrapped in paper |
In this case, the front extraction arch section was made of three solid clay bricks. The upper most of these would stand up into the clay walls, so this piece was wrapped with newsprint to keep the clay from sticking to the surface. It is worth noting here that all the blocks and bricks had been used a number of times previously. Concrete does not endure the high temperatures of the smelting furnace well, plus these blocks have been stored outside and are subjected to winter freeze and thaw. Even still, these same blocks have served for a number of years.
The easiest (and cheapest!) material for the body of the furnace is clay. A local dug clay may or may not have the temperature resistance required (remembering that internal temperatures will reach 1300 - 1400 C). The found condition of a local clay may also not balance the cost saved over labour required in preparation. In the case of Wareham, the available local clay is a very low firing temperature red earthenware, which is exposed as a hard dry layer, containing many small stones. For those reasons, and simple ease of handling, a commercial potter's clay is purchased.
A number of different materials may be added to improve temperature resistance and durability :
- Sand - will improve temperature resistanceOther added materials are sometimes suggested by fragmentary archaeological remains, but in most cases the functionality of these is questionable. Sauder's standard mix is 50 / 50 clay and sand, and often uses broken and crushed remains of earlier furnaces as an addition as well. It is worth noting that he takes considerable time with each build and for that reason creates quite durable furnaces able to withstand multiple uses.
- Organics - will physically resist cracking and limit steam expansion problems
Organics offer different desired qualities at different locations across the wall thickness. On the outside, they will remain, acting as re-enforcing within the clay. In the middle (depending on diameter of the type used) they create hollow strands, allowing some place for water into steam to expand into. In the internal portions, they burn away as the walls heat, creating air pockets as a simple refractory.
Straw as an organic has been found to hold individual applied bricks of clay mix together, but not to blend between individual bricks. It does provide good steam venting. Even chopped to short lengths, straw tends to be sharp and hard on the working hands.
The choice here is a high temperature Kaolin (EPK), rated for a 1750 C melting point. The well proven mix is equal dry volume thirds of EPK, course sand, and shredded dry horse manure. The manure is in the form of last year's droppings, which come apart into individual short strands when the pucks are rubbed between the hands. This mix is blended by hand, then water added to reach a suitable working quality. This amount is a mater of experience, the result needs to be soft enough to easily stick together as added, but no so soft as to allow for slumping as the walls are built upwards.
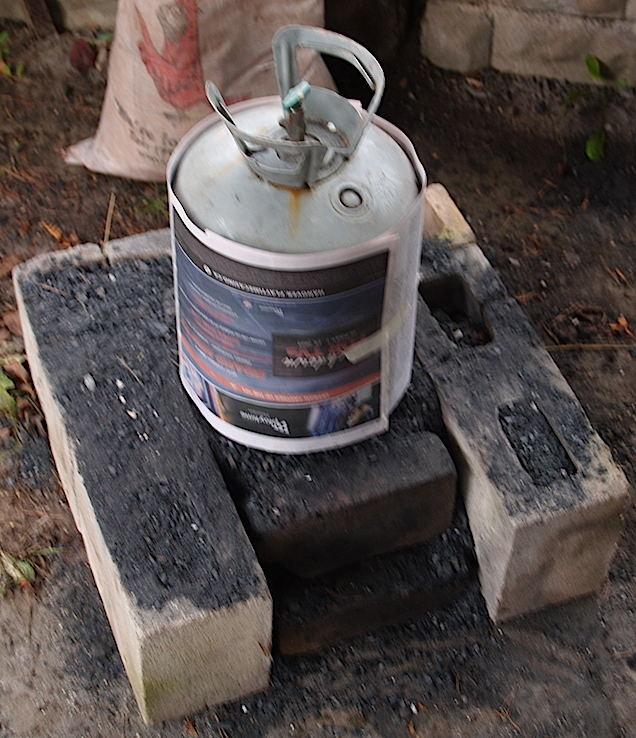
Because of the often repetitive experimental nature of the iron smelts undertaken here, use of an internal form both speeds and standardizes the internal diameters. In this case, a cylinder originally used for containing helium for balloons had been found, which has a suitable diameter of 25 cm. This is wrapped with a couple of layers of newsprint to prevent clay sticking.
 |
 |
| Metal can form in place |
First course of clay,
packing inside |
 |
 |
| Second course of clay
added |
Completed furnace |
The clay mixture is formed into individual balls about the size of a grapefruit to allow for ease of compacting and excluding any trapped air. These are formed into flattened brick shapes to apply to the outside of the form. As the walls are built up, it is important to firmly blend the edges of successive bricks together, but at the same time use one hand to support the soft clay from bulging outwards. Without this support, the walls will end up becoming thicker, not taller. This form allows for a build of about 20 cm, before it must be lifted clear. At this point, any gaps on the inner surface can be blended closed.
To support the constructed walls, the interior space is filled with a 50/50 mix of dry sand and wood ash. This packing will also pull moisture from the clay, speeding drying. The metal form is covered with new paper and simply placed on top of the packing for the new build layer. If the walls appear to be in danger of slumping, they can be supported on the exterior surface by wrapping a length of rope in a spiral around the outside.
As mixing is being done by hand, typically an amount able to be manipulated also is about the volume required to construct a height of the form used to a roughly 7 cm thick wall. Normally the walls thin out slightly as the build moves upwards, to about 5 cm at the top. Taken together, three batches applied with three shifts in the form yields 60 - 65 cm total wall height.
The ideal is to build the furnace at least several days before the intended smelt, allowing the clay to air dry as much as possible. At this point the packing material is scooped out, the interior surface rubbed to remove any loose ash / sand mix.
At this point the clay should be 'leather hard'. This will allow for the cutting of any additional extraction or tapping arches that might be desired. The hole for the tuyere is also cut, and the tuyere mounted and fresh clay added to seal it tight to the body.
To ensure the furnace body is completely dry, a small fire is lit inside, using a handful of wooden sticks. This process extends over several hours, more sticks being added to keep the gentle heat continuing. A metal cover is placed on the top of the furnace, with a small gap to ensure venting. This acts to hold as much of the developed heat inside as possible. It is important not to heat too fast, or the contained water will flash into steam, and with rapid expansion, can blow off pieces of the interior walls.
 |
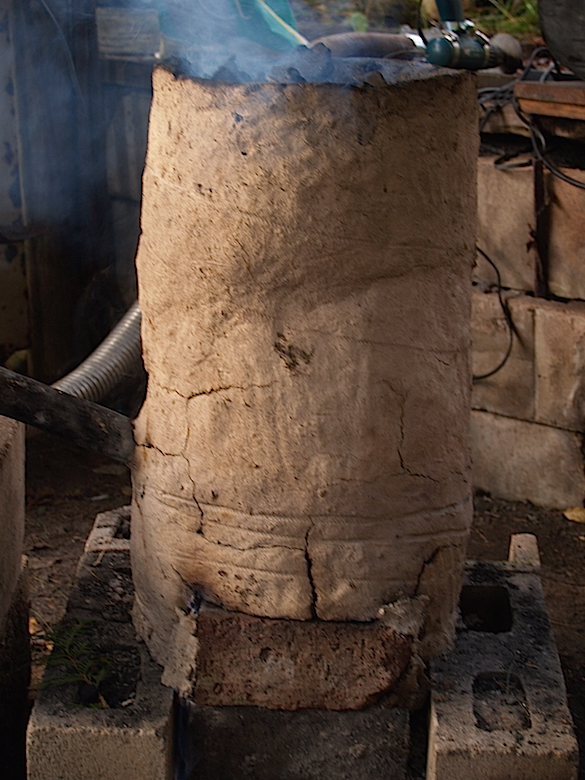 |
| Contained water venting
as steam fog |
Result of poor blending
of clay |
In this case, the slow drying fire process was carried out over two hours, the evening before smelt day. At that point the metal cover was placed loosely on the top, and the fire and coals inside allowed to die out.
As can be seen in the image above, right, the impact of a new worker on the build process are clear. The individual applied bricks were only superficially blended together, this largely due to lack of experience working with large clay structures. The image was taken the next morning, early in the full charcoal burn. The effect of venting gases through the cracks can be seen. None of these cracks either vented enough gas to effect the smelting process or caused any failure to the furnace during the smelt. They would reduce the strength of the structure to the point it would break apart during the rigours of extraction.